
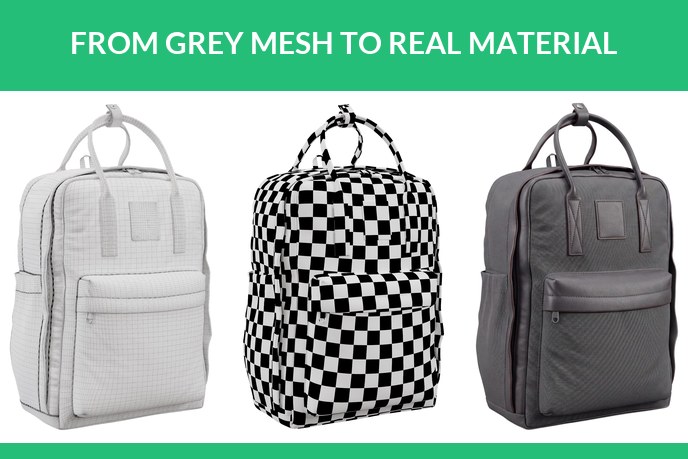
A product model leaves the modeling stage grey. Texturing is the step that turns that grey shape into brushed brass, ripstop nylon or oiled leather, and it is the step that decides whether a render looks like the product or like a plastic toy of it. Geometry gets the proportions right. Texturing is what makes a customer believe the picture.
This page covers what texturing actually is, the maps a product model carries, how the work is done, when a library texture will do and when it will not, where textures come from and what the stage costs. We run a studio that builds and textures models for product brands, so this is written from the production side rather than from a tutorial.
What is in this article
#1. What texturing actually is
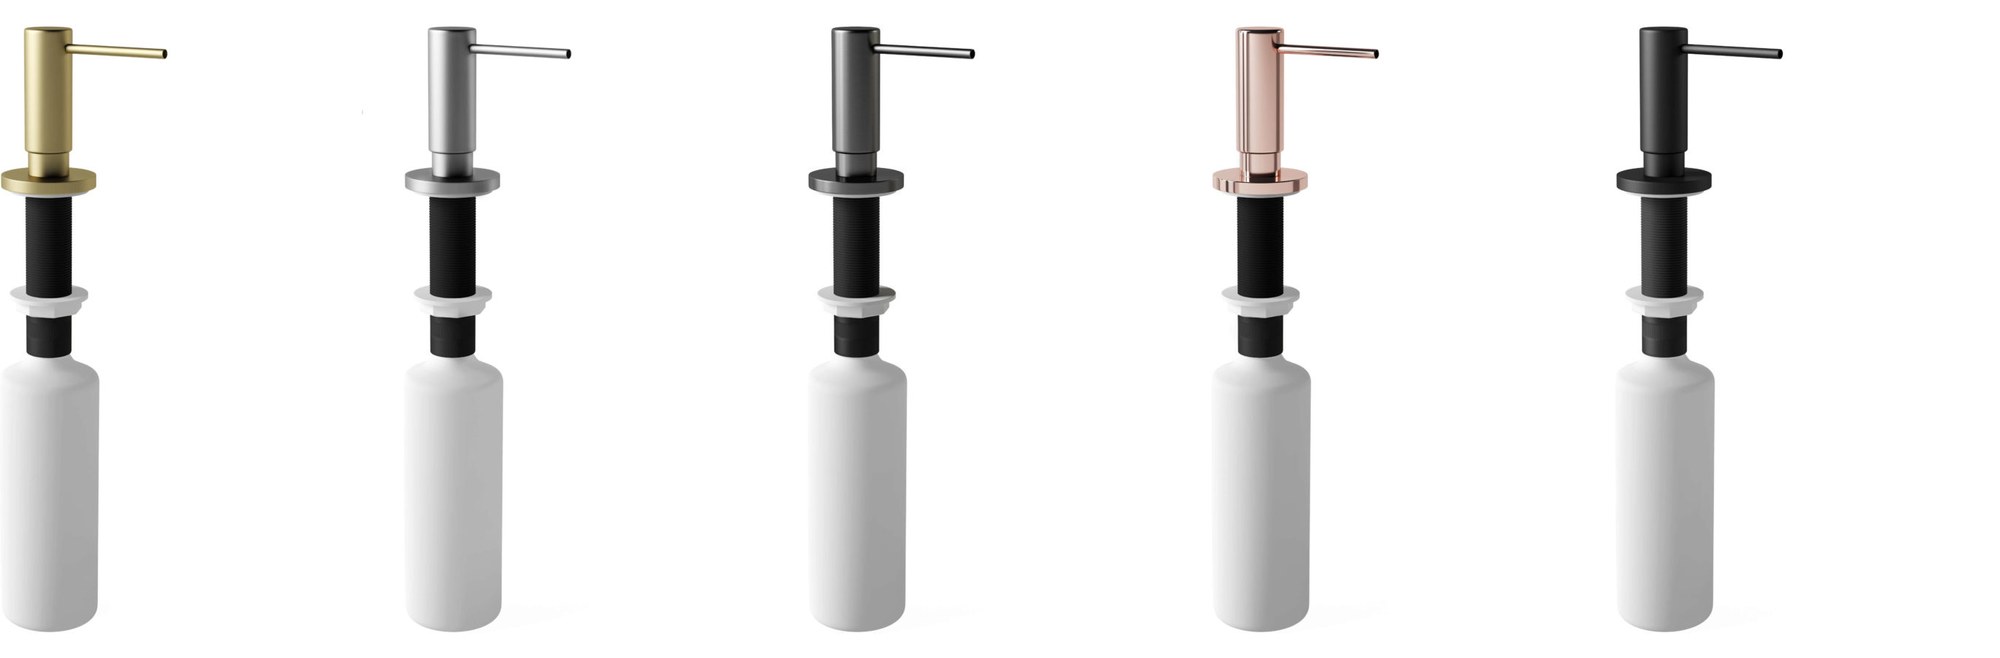
One model, five finishes. The geometry is identical in all five; only the material changed.
A finished 3D model is geometry and nothing else: points in space, the edges between them and the faces they enclose. It has a shape and real dimensions, and it has no colour, no shine and no sense of what it is made of. Open one in any viewer and you get a grey object. Texturing is the stage that answers the question the geometry cannot: what is this thing made of, and how does that material behave when light hits it.
Two words get used interchangeably and should not be. A texture is an image, a flat picture wrapped onto the surface. A material is the full description of the surface: usually several textures plus numeric settings for reflection, refraction and so on. You do not apply a texture to a product and call it done. You build a material, and textures are the ingredients.
Modern product work is almost always PBR, physically based rendering. The idea is that a material is described in terms that correspond to physics rather than to one lighting setup, so the same brushed steel behaves correctly in a white studio, in a lifestyle kitchen and in a customer’s living room through an AR viewer. Without it, every new scene means retuning the surface by hand.
The practical consequence is the part brands care about. Because material and geometry are separate, one model can carry any number of finishes, and adding the sixth colourway costs a fraction of building the product again.
#2. The maps a product model carries
A product material is assembled from several images, each controlling one property of the surface. Nearly every commercial model carries the first four; the rest depend on the product.
| Map | What it controls | When a product needs it |
|---|---|---|
| Base colour | The colour of the surface with no light or shadow baked in | Always. Baked-in highlights are the classic amateur giveaway |
| Roughness | How sharp or blurred reflections are | Always. This is the map that separates matte plastic from polished, and worn from new |
| Metallic | Whether the surface behaves as metal or as a non-conductor | Anything with metal parts: hardware, zips, buckles, trims |
| Normal | Fakes small relief by bending how light reflects, without adding geometry | Nearly always: stitching, leather grain, knurling, woven fabric |
| Displacement or height | Real relief that changes the silhouette | Deep patterns seen up close: tread, thick weave, embossing on the edge of a shot |
| Ambient occlusion | Soft contact shadow in crevices | Optional in offline renders, valuable in real time and in web viewers |
| Opacity or alpha | Where the surface is transparent | Mesh pockets, bottles, packaging film, anything you can see through |
Resolution is the other half of the decision. Product work usually sits at 2K or 4K per material, but the number that matters is texel density: how many pixels of texture land on a centimetre of surface. A zip pull that the customer will zoom into needs far more than the back panel nobody looks at, and spending the same density everywhere is how a model ends up too heavy for a marketplace viewer. Where the platform ceilings sit is covered in 3D modeling standards for product models.
#3. How the work is done, step by step
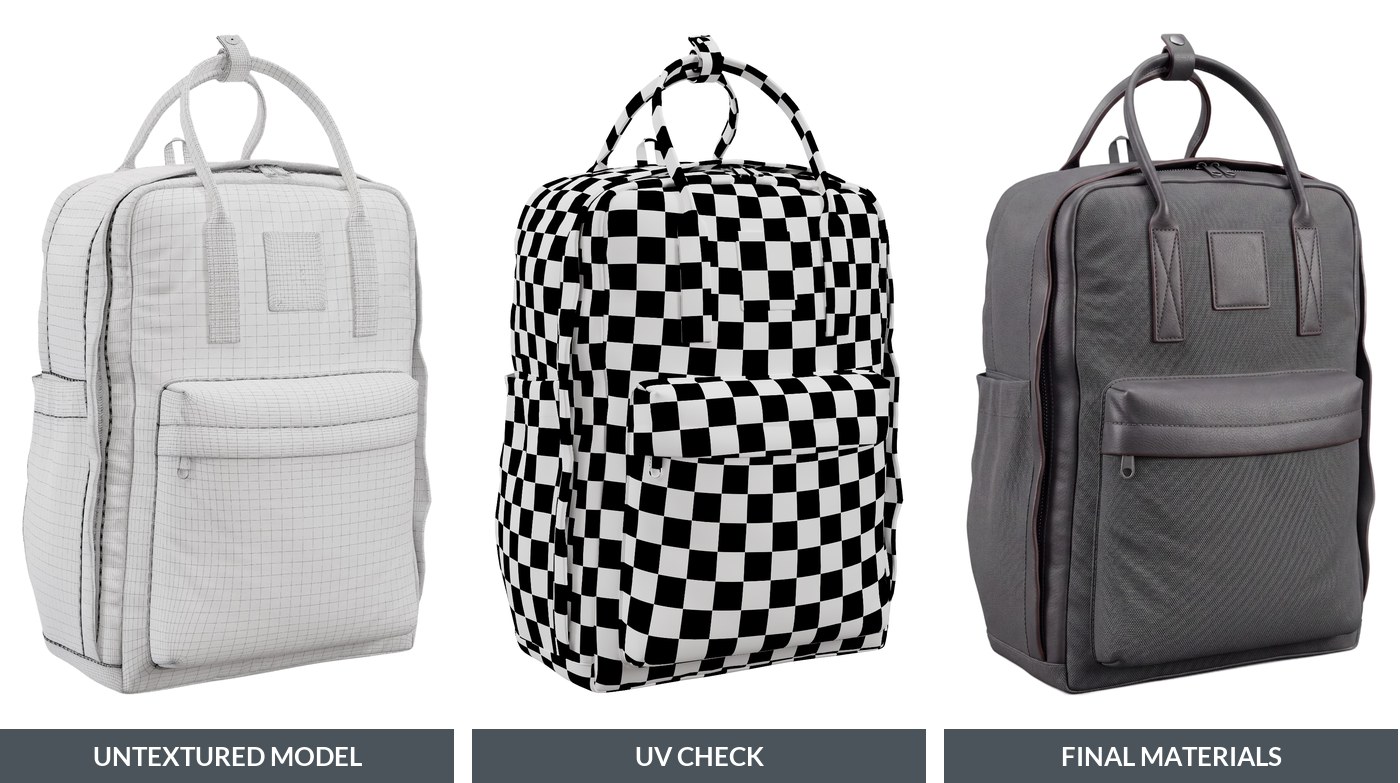
The same backpack at three stages: bare geometry, the checker test that proves the UVs are even, and the finished materials.
UV unwrapping. Before an image can be wrapped onto a surface, the surface has to be flattened into two dimensions, the way a paper pattern flattens a jacket. Seams are cut where a real product already has them, along a stitch line or an edge, so nothing lands in the middle of a visible panel.
The checker test. A checkerboard is applied before any real texture. The squares have to stay square and stay the same size across the whole object. Stretched squares mean the pattern will smear; squares of different sizes mean the weave will be coarse in one place and fine in another. This is a two minute check that saves a re-do later.
Materials per part. Each part gets its own material: canvas body, leather trim, metal zip, rubber foot. Parts stay separate in the file, which is what later allows a configurator to swap one of them without touching the rest.
Light test and export check. The model gets viewed under studio light, warm interior light and hard daylight, because a material tuned to one setup and broken in another is not finished. Then it is exported to the formats the project actually needs and looked at again in the target viewer, since compression and format limits change how a material reads.
#4. Library texture or authored: how to choose
Not every surface needs to be made from scratch, and pretending otherwise just makes a project expensive. The honest split:
A library texture is enough when the surface is generic and no one will study it: a plain rubber foot, an unbranded plastic housing, a background prop, a fabric that is barely visible in the shot. Good libraries ship complete PBR sets, and using one is a saved day, not a compromise.
Authored is the only option when the surface is the product. A specific weave the brand is known for, leather grain that matches a physical swatch, a logo pressed into the material, colourways that have to hit a Pantone reference, or anything a customer will zoom into on a product page. The same applies when the model feeds a configurator: swappable finishes have to be built as a consistent set rather than collected from different sources.
Most real jobs sit in the middle. A library base gets used for the bulk of the surface and the parts that carry the brand get authored on top. The most common giveaway of a cheap job is not a missing map, it is a library texture repeating in a visible tile across a large panel.
Building a material that matches a physical swatch rather than approximating it is everyday work in our 3D modeling studio.
#5. Where the textures come from
When a library texture is the right call, these are the sources worth having bookmarked. They are also the places to pull references from when you are writing a brief: pointing a studio at an exact material beats describing it in words.
| Library | Best for | Cost and licence |
|---|---|---|
| Poliigon | Large, consistent PBR sets plus models and HDRIs; plugins drop assets straight into Blender, 3ds Max, SketchUp and Cinema 4D | Free tier; about 27 USD a month for an individual and 59 for a team, roughly half that paid yearly |
| Quixel Megascans | Scanned surfaces and decals at the top end of realism: fabric, leather, fur, metal, rubber, plastic | After Epic bought Quixel the library lives on Fab, 18,000 plus scans; free to use in Unreal projects, standard Fab licence otherwise |
| CGTrader | Marketplace rather than a library: ready models and materials from individual sellers | Per item, wide price range; check the licence on each asset |
| 3DTextures.me | Free PBR sets, strong on everyday surfaces | Free |
| 3Dassets.one | Search across many free libraries at once instead of visiting each | Free, aggregator |
| CGBookcase | Clean, well made free sets with no attribution required | Free for any purpose |
| Textures.com | The largest photo-sourced collection, useful when you need a specific real surface | Credit system with a free allowance |
One caution about licences. Free does not always mean free for commercial use, and a marketplace asset bought under a personal licence has no business appearing in a campaign. Check before the file reaches a render, not after.
#6. What it costs and how long it takes
In our pricing texturing is not a separate line item. It sits inside the price of the model, because a product model without materials is not a deliverable. For scale: a simple part starts around 80 USD and a day of work, a typical product such as a speaker, a soap dispenser or a backpack lands near 200 USD and two to three days, and a complex product with a working mechanism runs to 400 USD and three to five days. The full breakdown is in what drives the price of a 3D model.
What actually moves the texturing share of that:
| Driver | Effect on the work |
|---|---|
| Number of distinct materials | A single-material bottle is quick. A backpack with canvas, leather, mesh, webbing, zip and rubber is six materials to build and balance against each other |
| Whether real references exist | Physical swatches or good macro photos cut guesswork out. A verbal description means iterations |
| Colourways | The first finish carries the cost. Each additional one is comparatively cheap, which is the whole argument for building rather than reshooting |
| Target platform | An offline render can afford 4K per material. A marketplace viewer with a few megabytes of budget needs the same look packed into far less, and that packing is skilled work |
| Zoom level | A hero shot at full screen needs detail that a thumbnail never will |
If you want the whole pipeline rather than this one stage, what 3D modeling involves walks through it, and 3D product modeling services is where a project usually starts.
3D model texturing FAQ
Catherine Paul
Content Writer, Editor
Catherine is a content writer and editor. In her articles, she explains how CGI is transforming the world of architecture and design. Outside of office, she enjoys yoga, travelling, and watching horrors.
Let us know if you’ve got an interesting project and want to work together!