

Most pages titled “rendering examples” are a wall of finished images. They prove somebody can render, and they answer none of the questions a person actually has before hiring a studio: what did the client send, what got built underneath, and what came out at the end.
So this page is the other version. Real projects shown end to end: what the client sent, the model that got built from it, and where the finished images ended up. Each answers a different question a buyer actually has: can you build it from a photograph, how does my branding get onto it, what if the only reference is somebody else’s catalogue listing, what happens when you already have CAD, and what do I get for the money after the first image.
Contents
- How to read these examples
- Leather boots: from one photograph
- Boxing gloves: a brand applied to a grey model
- Cordless drill: one catalogue photo in, a studio render out
- Diamond ring: the client sent CAD, not photographs
- Cordless vacuum: one model, a whole campaign
- What these projects have in common
- Want an example in your category?
- If you have a product to model
- Frequently asked questions
How to read these examples
The finished render is the least informative part of any of these projects. What decides whether a model is worth anything is what sits under it: whether the mesh follows the object, whether parts are separate, whether the density sits where the detail is. A clean model can be textured, recoloured, animated and exported to AR. A messy one produces one nice picture and nothing else, which is the whole argument in our guide to 3D model quality issues.
Two of the projects below have a slider: drag it and look at the geometry, not the lighting. The rest run left to right instead, in the order the work happened: what the client sent, what got built from it, what was delivered. Every image opens full size on click. How that road runs in general, rather than on these five products, is in our guide to 3D product rendering.
Leather boots: from one photograph
The client sent a product photograph, nothing else. No CAD, no drawings, no sample. That is the most common starting point we get, and it is enough when the reference shows the shape honestly.
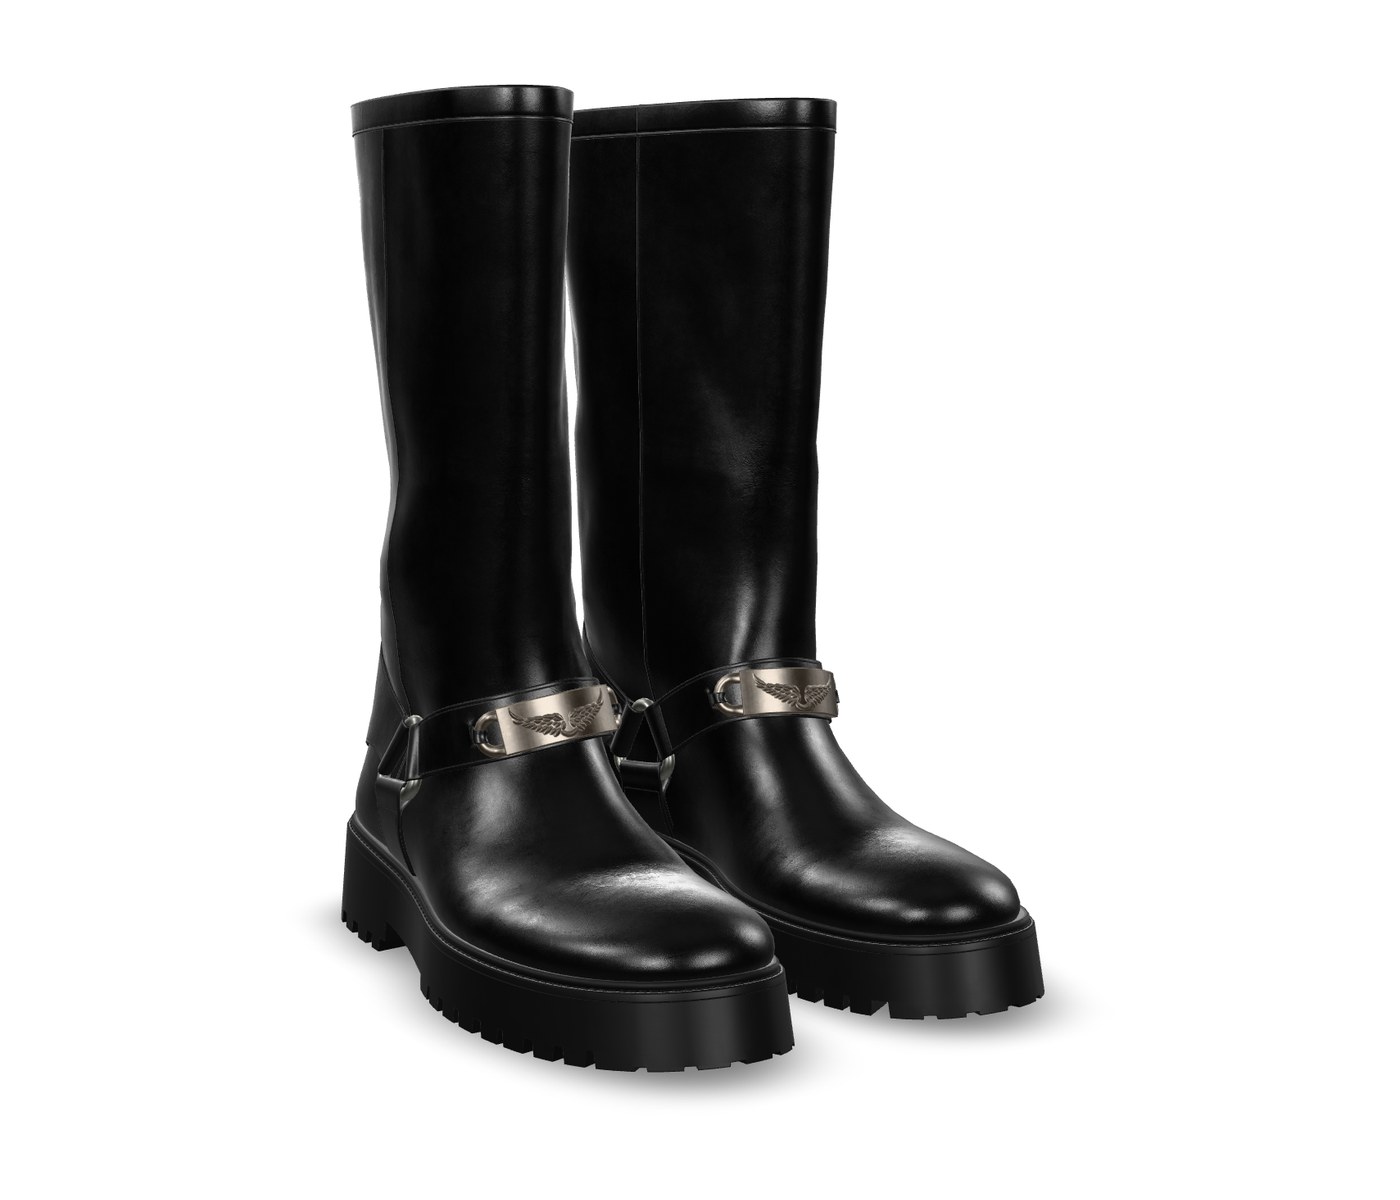
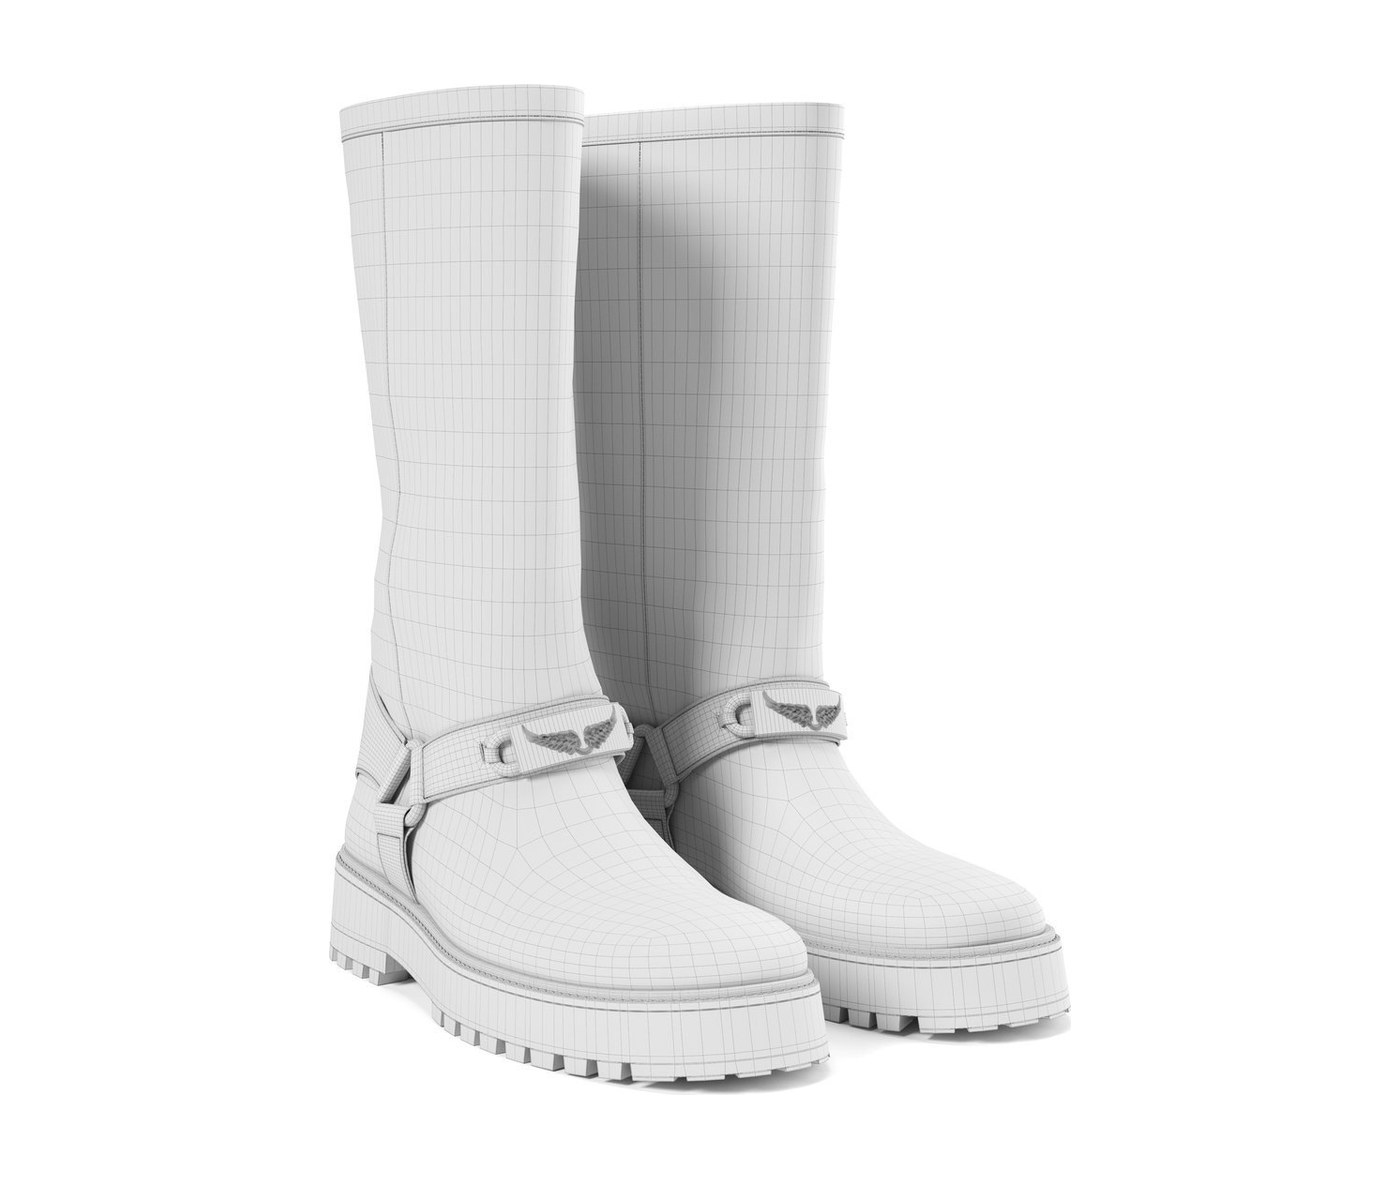
3D modelFinal renderdrag to compare
Drag to see the mesh under the render. Note the density around the sole and the buckle, and how little of it sits in the flat shaft.
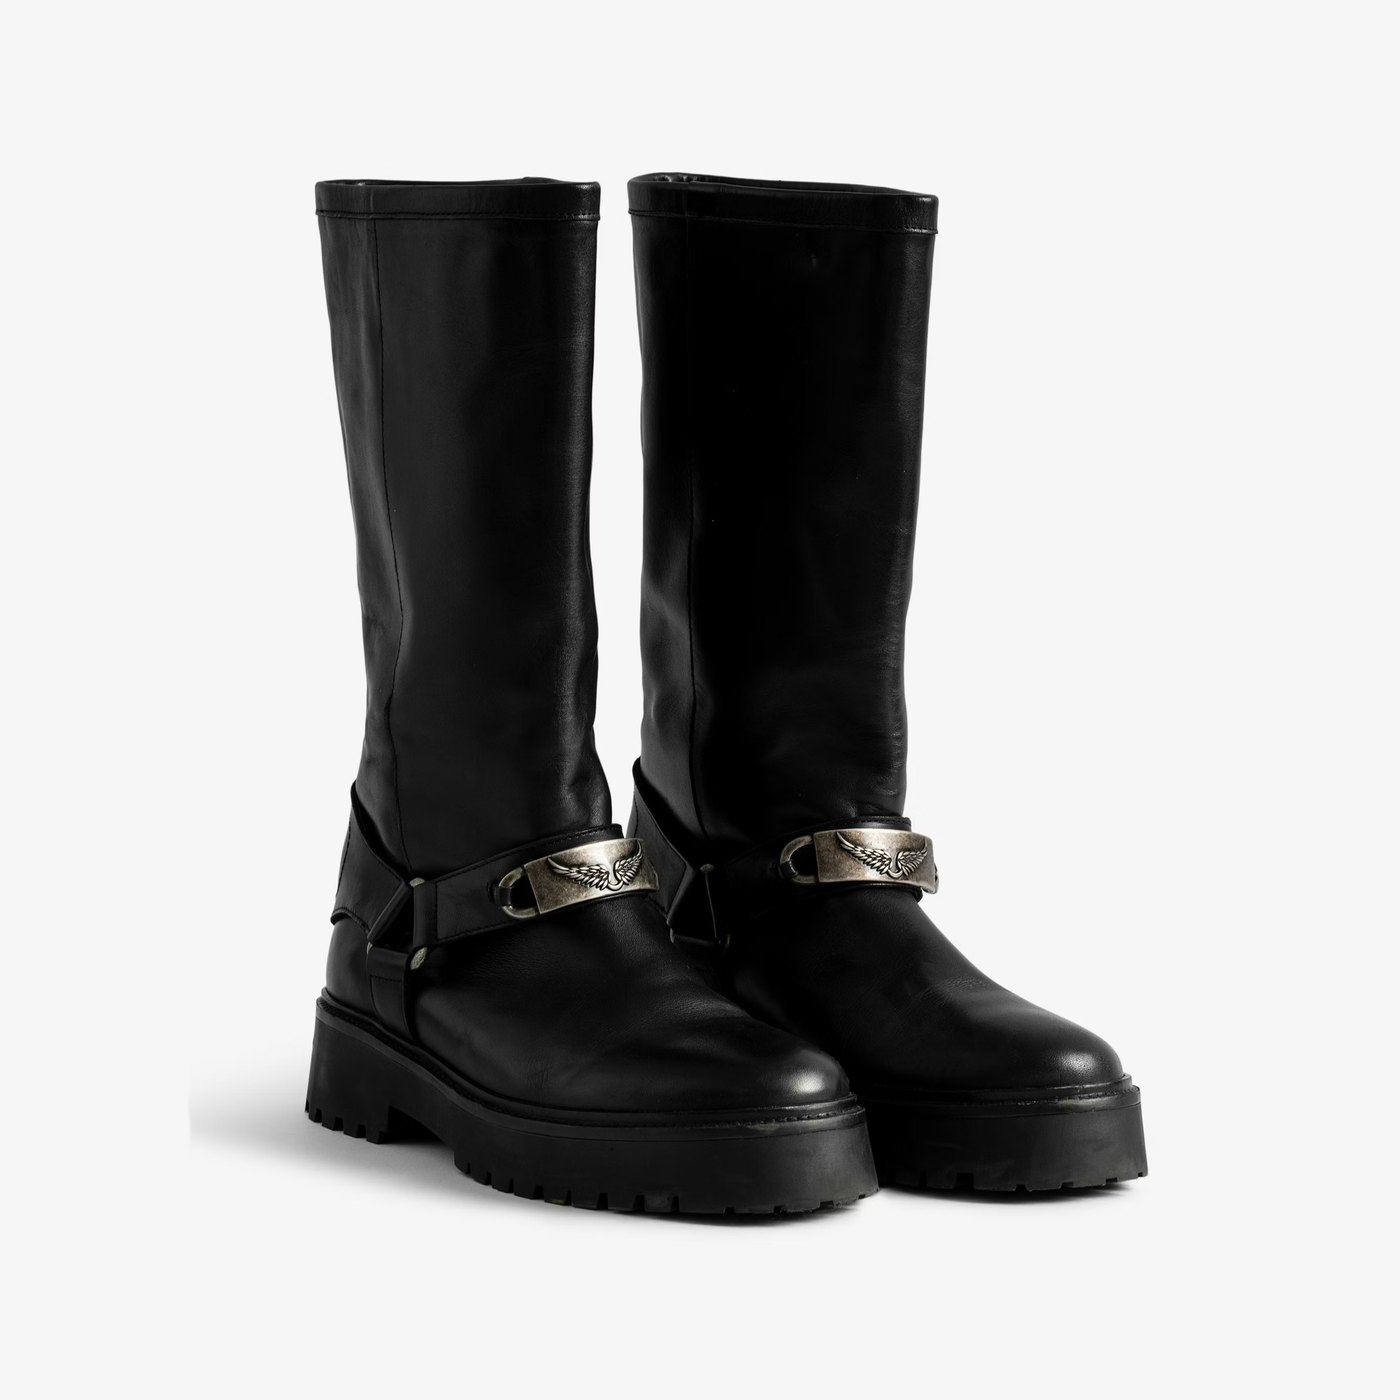
The photograph the client sent. That single image was the only input for everything above.
And this is the file itself, the same one a store page or an AR viewer would be handed. Nothing below is an image.
The delivered model, 9 MB, drawn by your browser in real time. Every angle you reach here is an angle nobody had to light, shoot or retouch.
- Supplied: one product photograph
- Built: quad mesh, separate parts for the sole, upper, hardware and strap
- Delivered: silo renders, and a model ready for colourways and 360
- Category: footwear, the same pipeline we use for fashion products
Boxing gloves: a brand applied to a grey model
PunchUP sent photographs of their gloves and the artwork that goes on them. This is the example that shows the order the work actually happens in: the shape is built and approved with no colour and no logo on it at all, and only then does the brand go on. Get that order wrong and every branding change costs modelling time instead of render time.
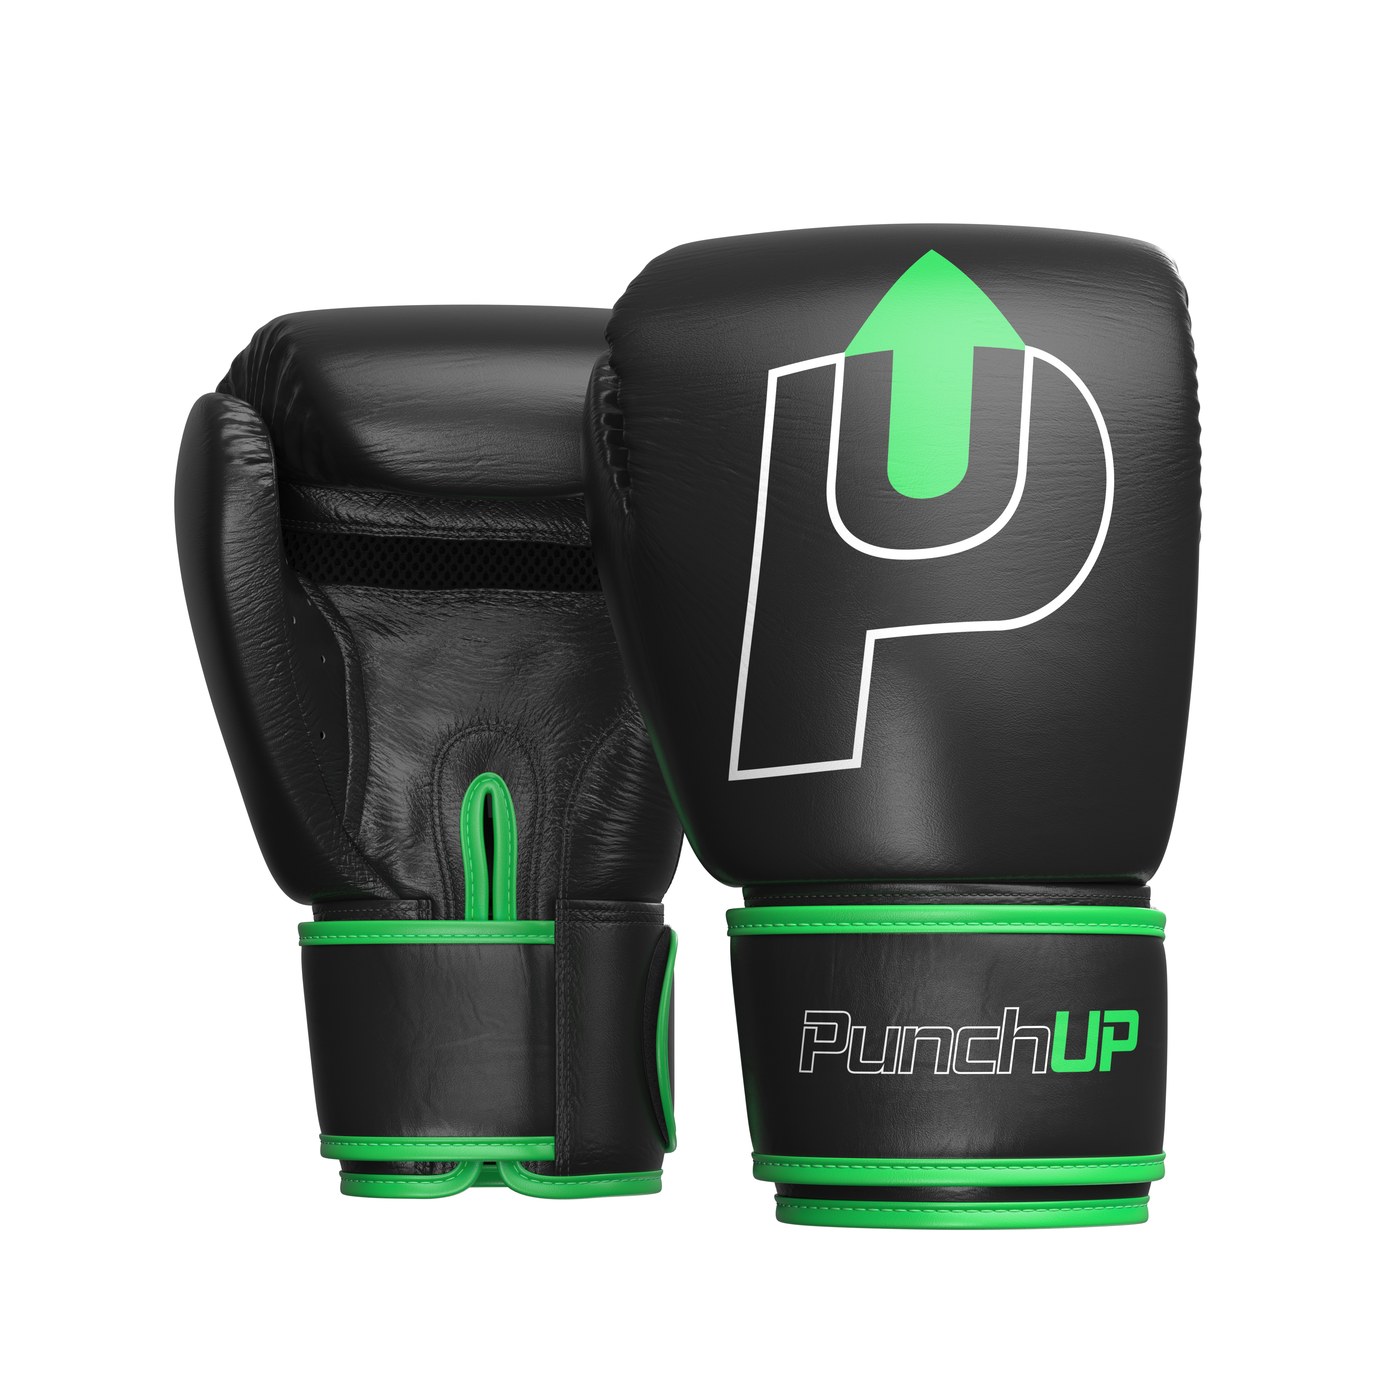
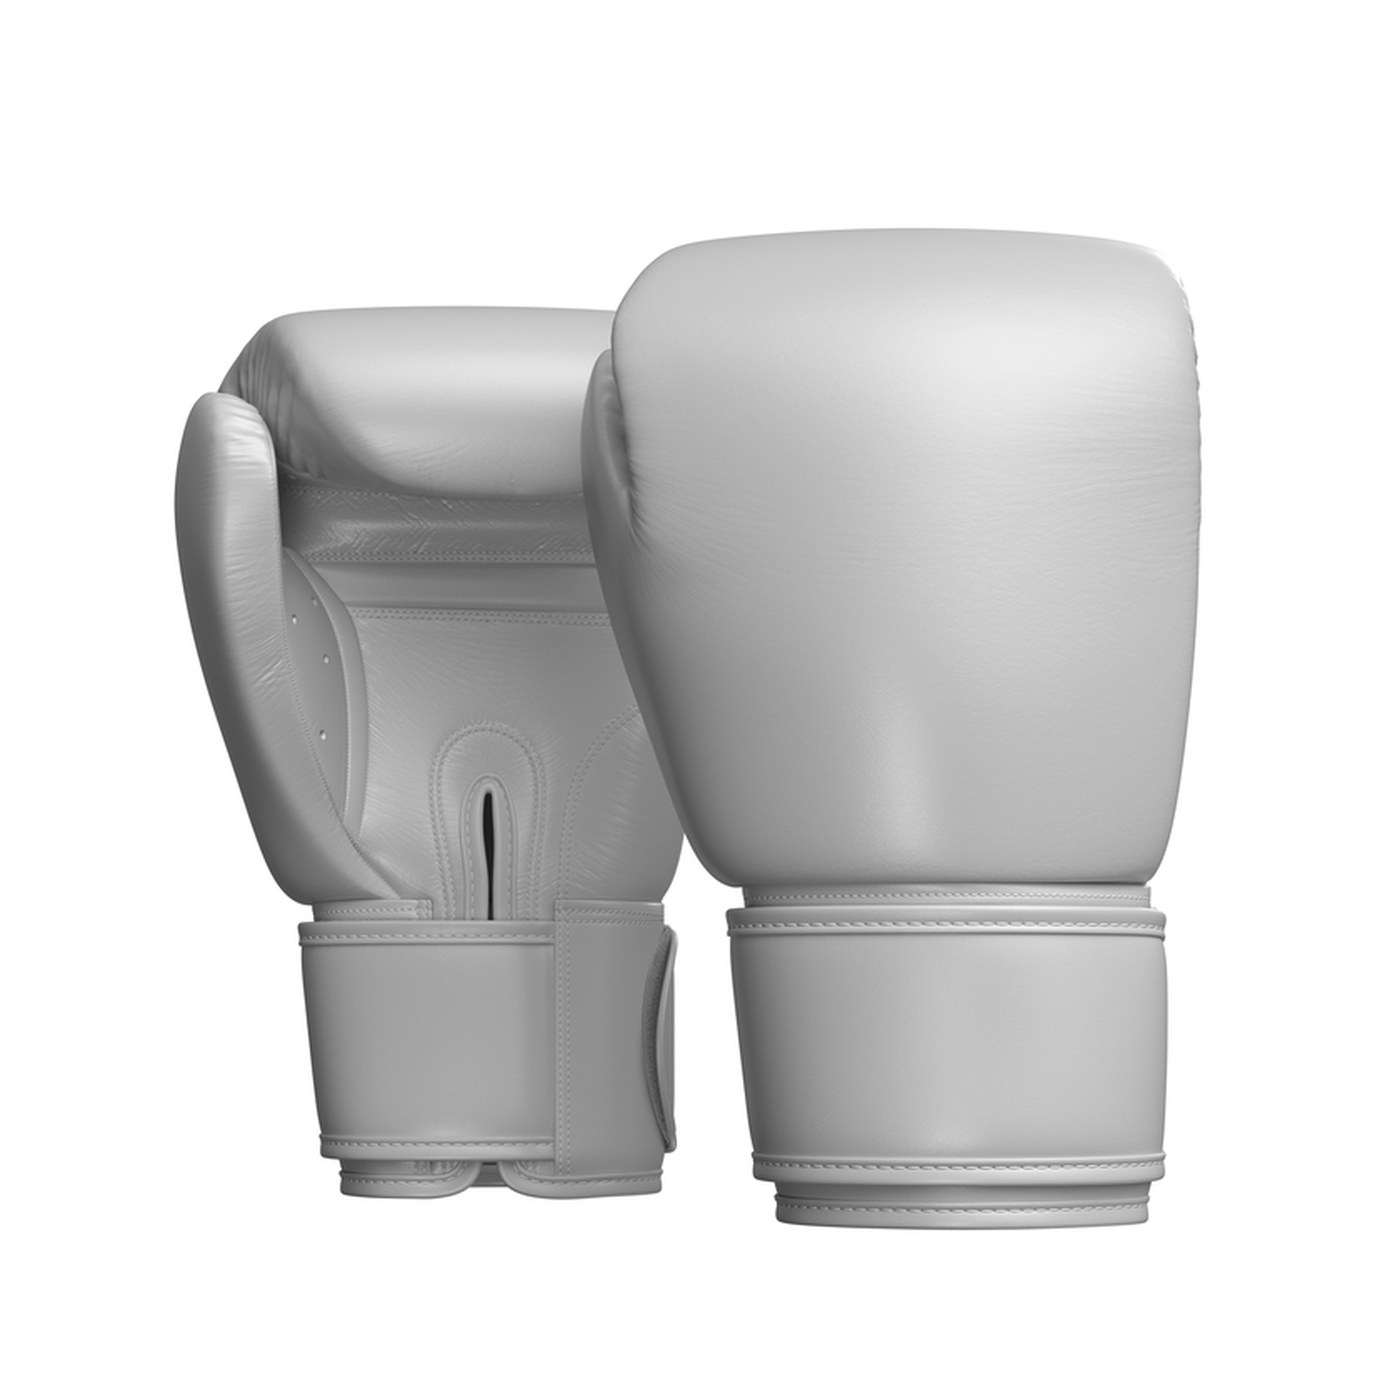
Grey modelFinal renderdrag to compare
The same camera, before and after materials. Drag it: nothing about the shape changes, only the leather, the stitching colour and the artwork.
What the client sent was a phone camera on a kitchen counter. That is enough, as long as the photographs cover the shape from more than one side and the branding is legible somewhere.
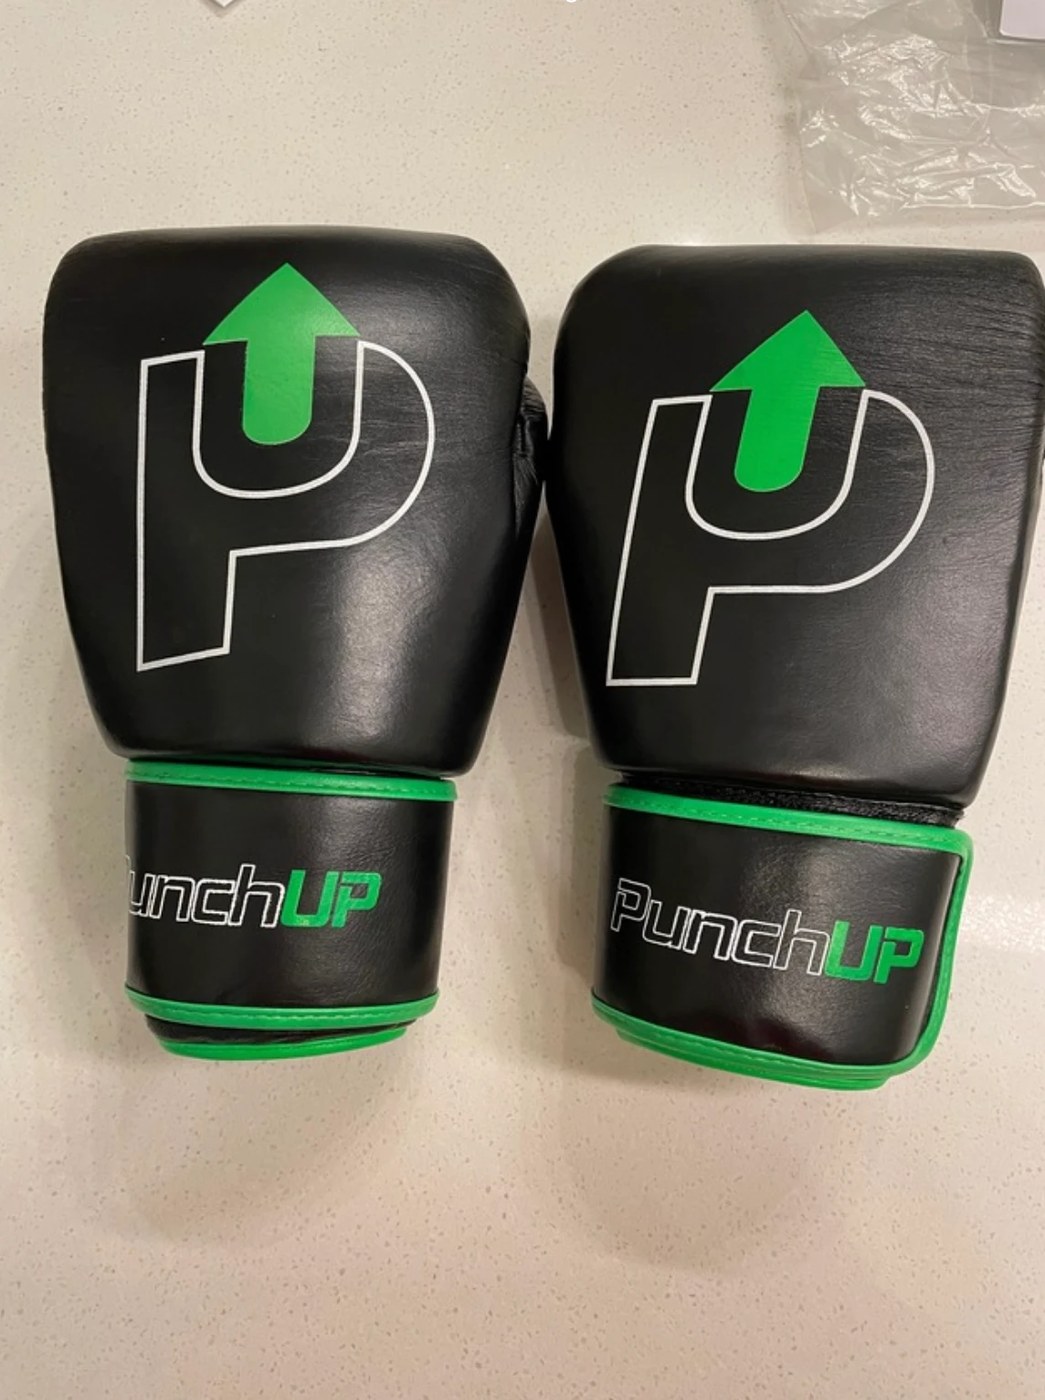
The pair from the front, with the logo and the cuff artwork readable.
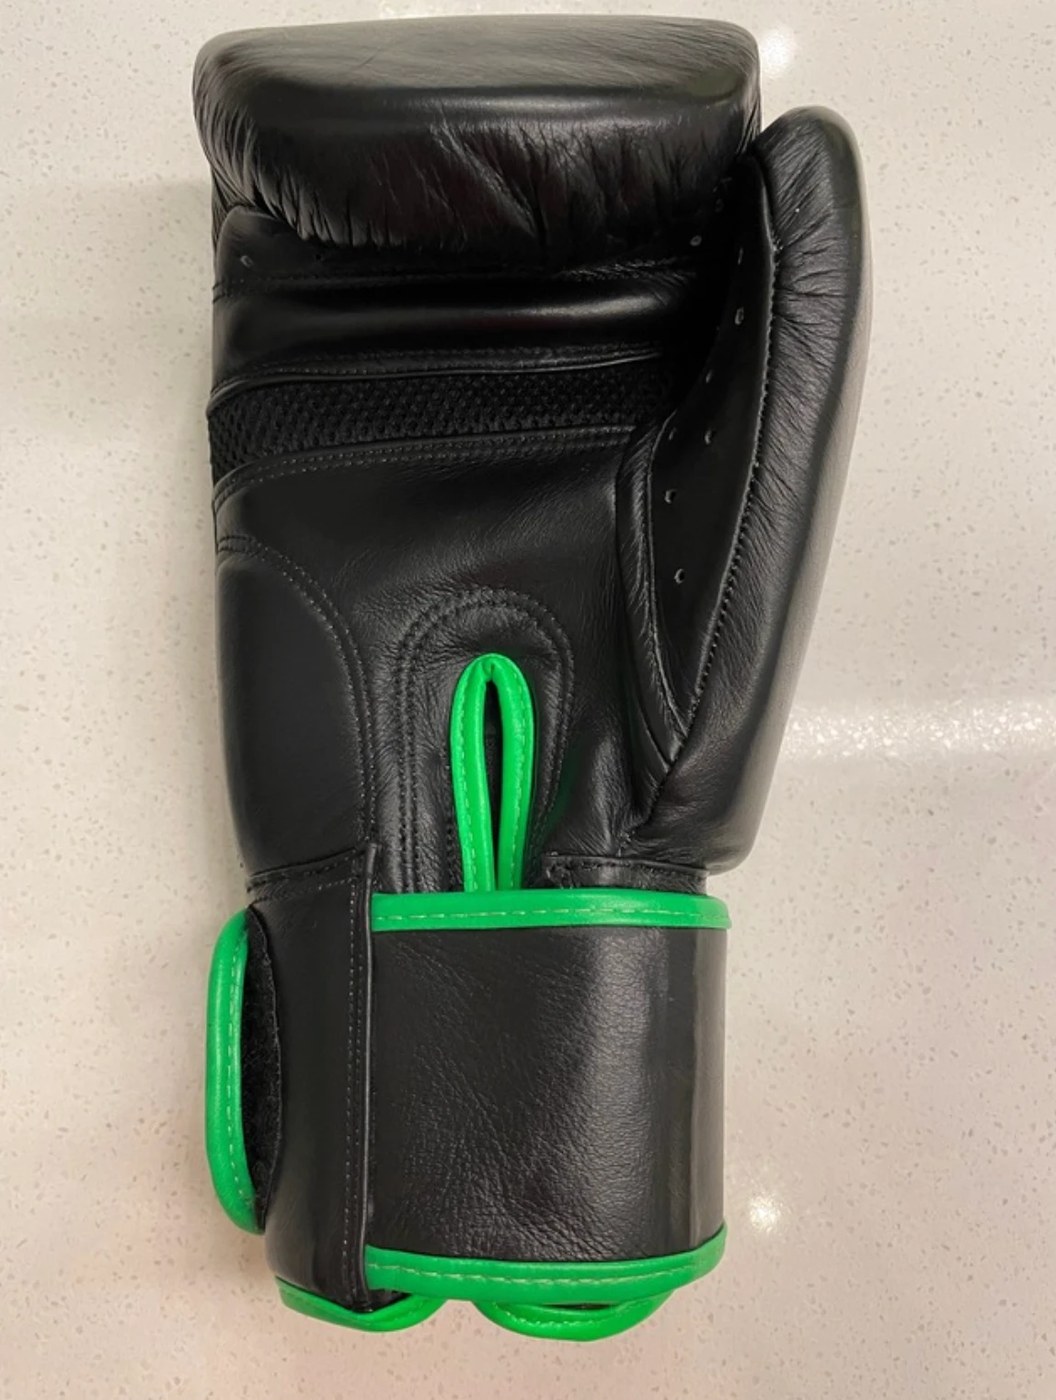
The side and palm, which is where the panels and the strap are decided.
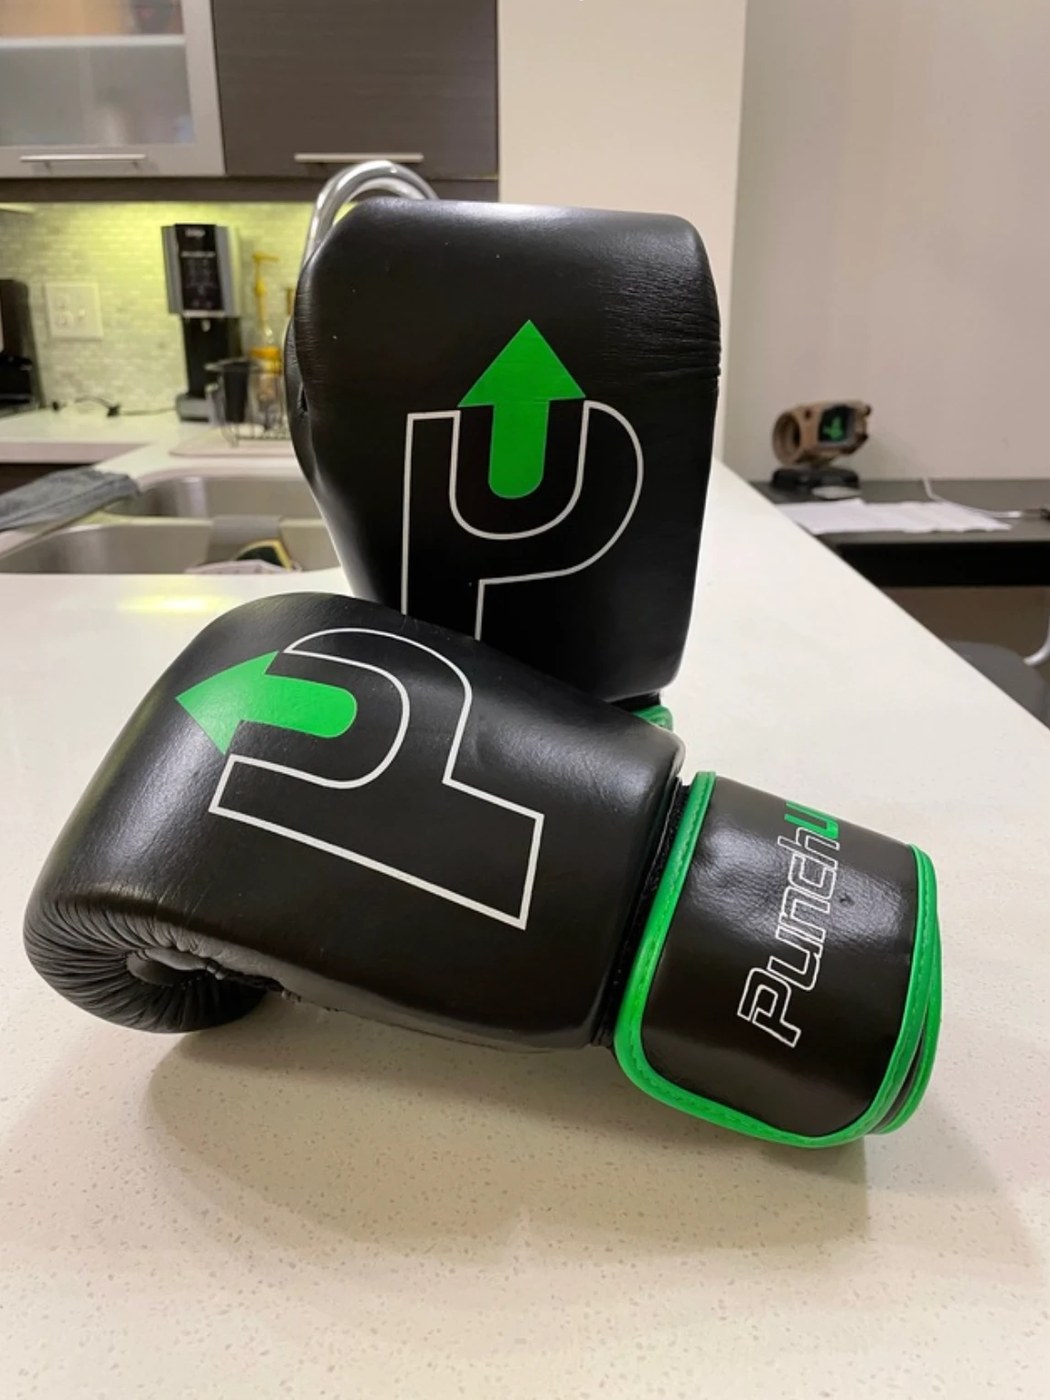
A three quarter view, the one that fixes proportion and thickness.
Once the model is approved, extra angles are a render setting rather than a new project.
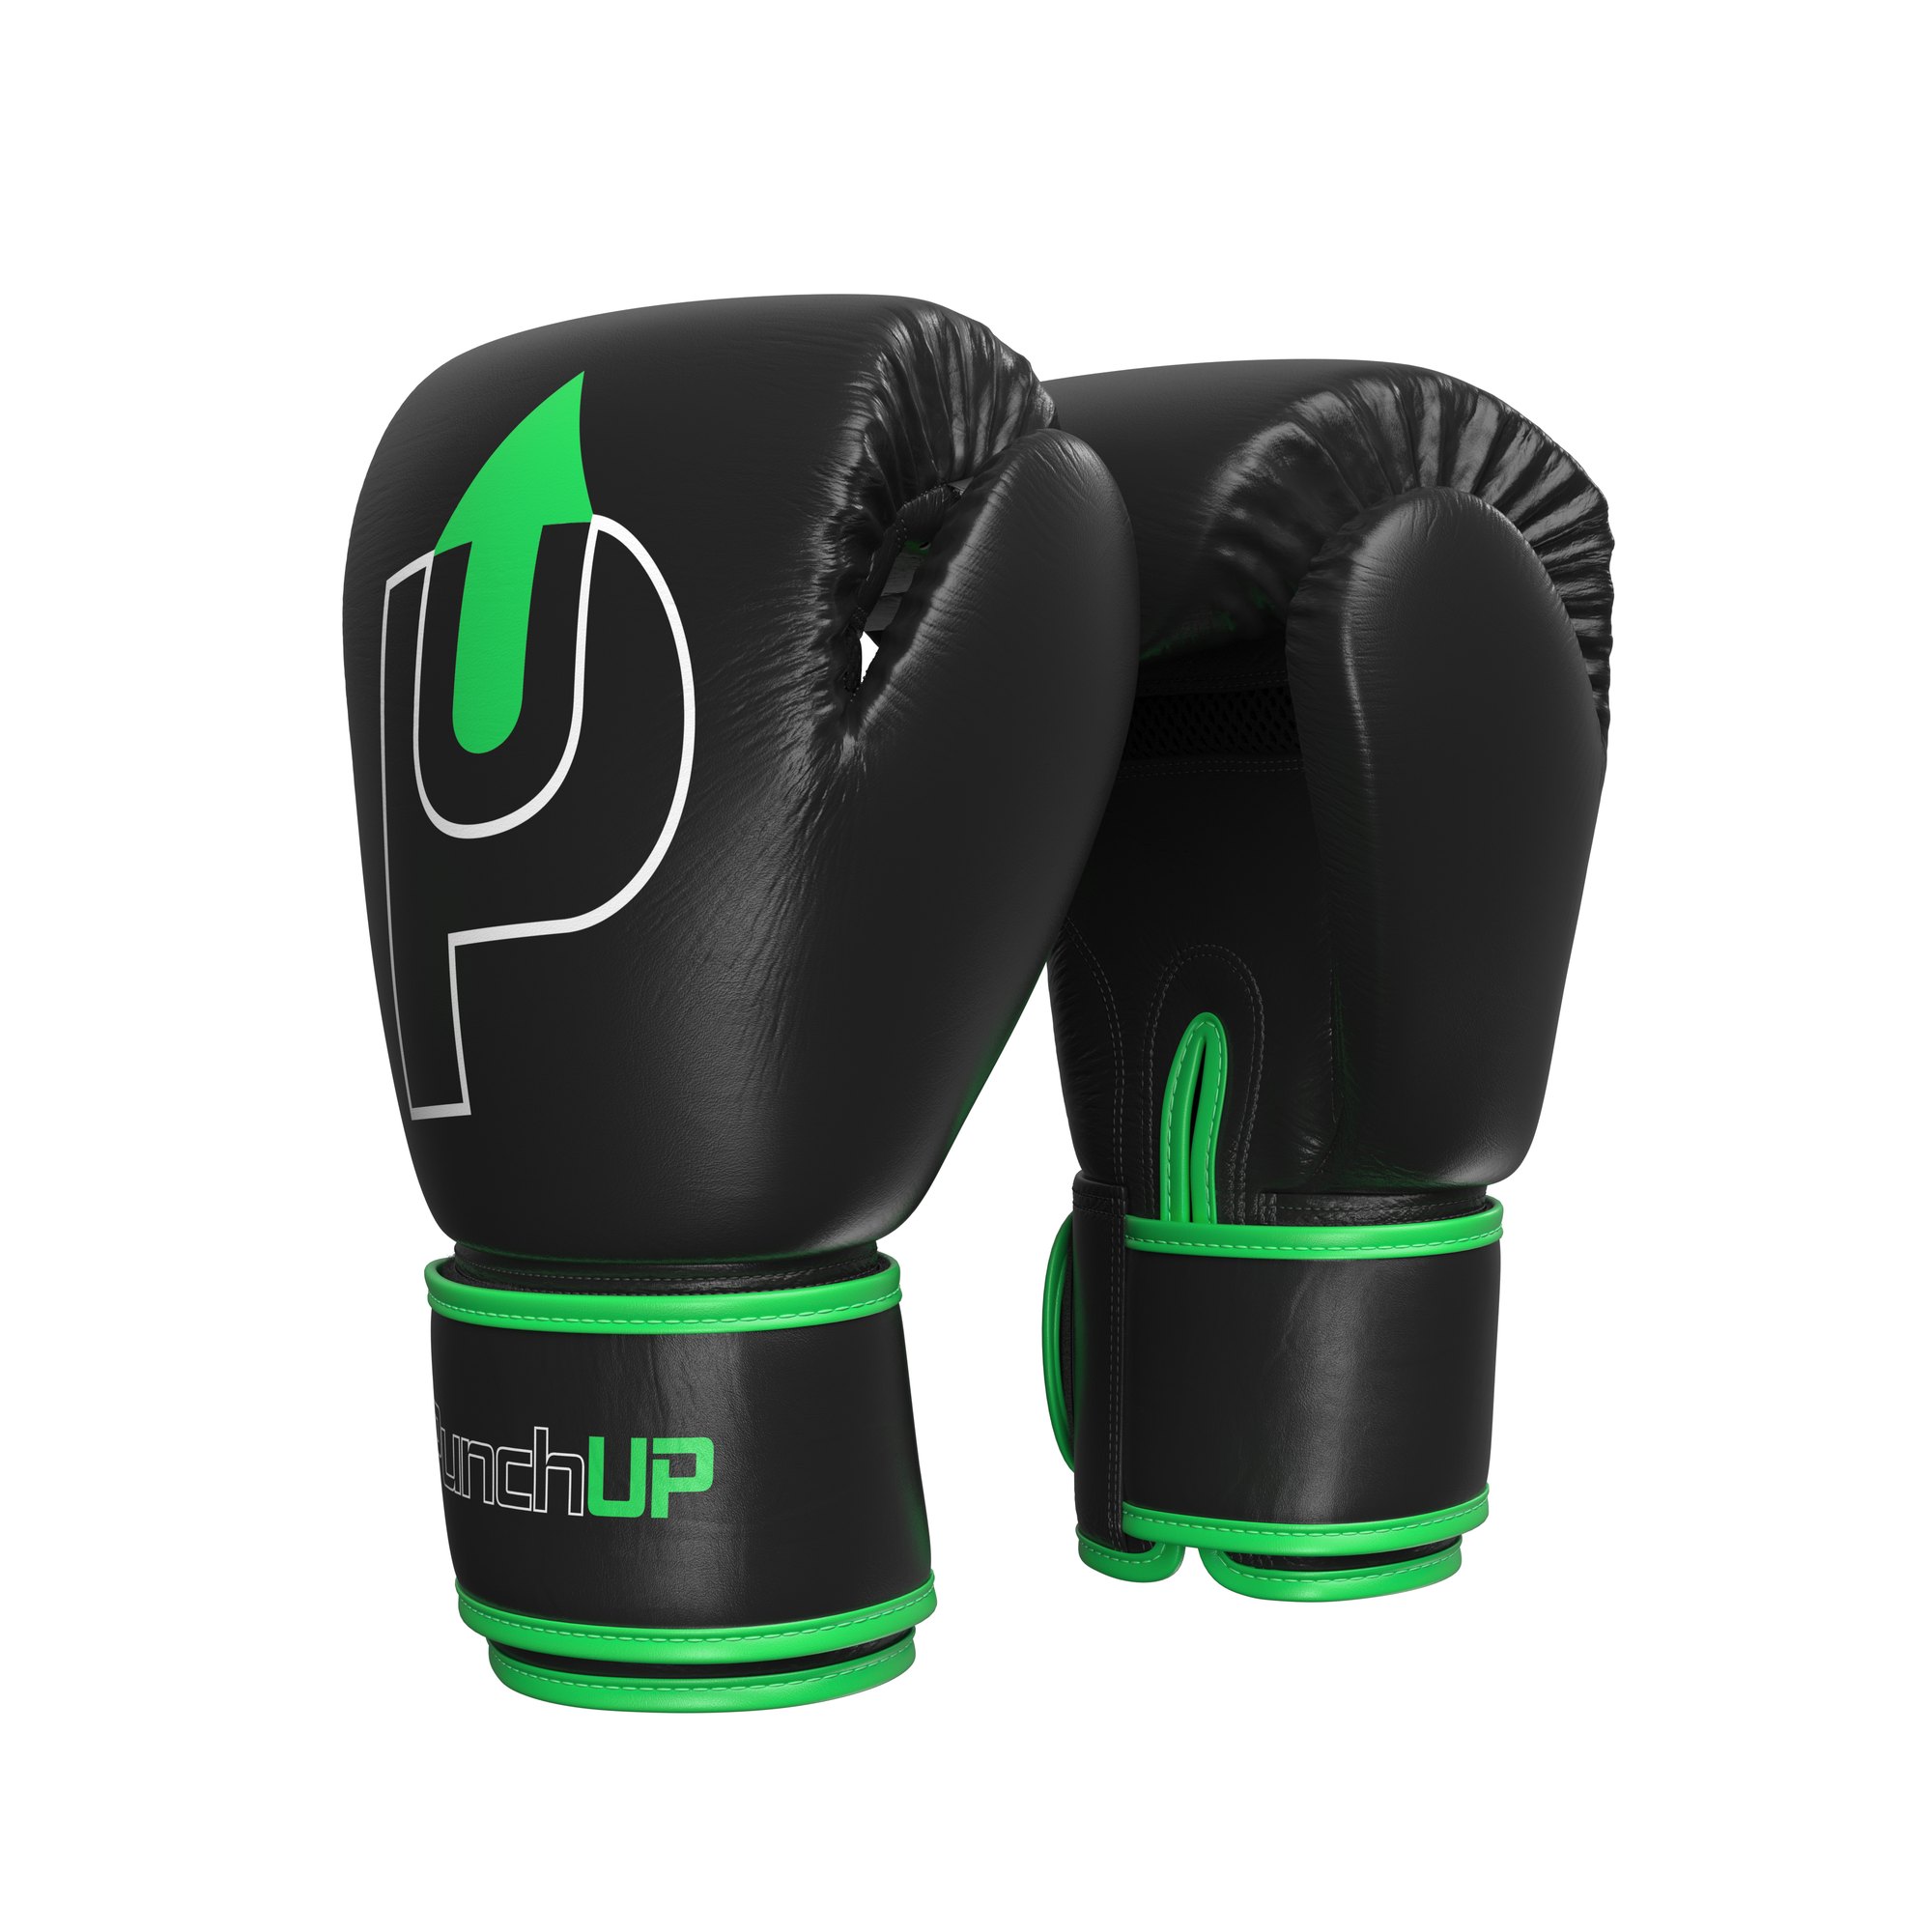
A second angle from the same file, cuffs forward.
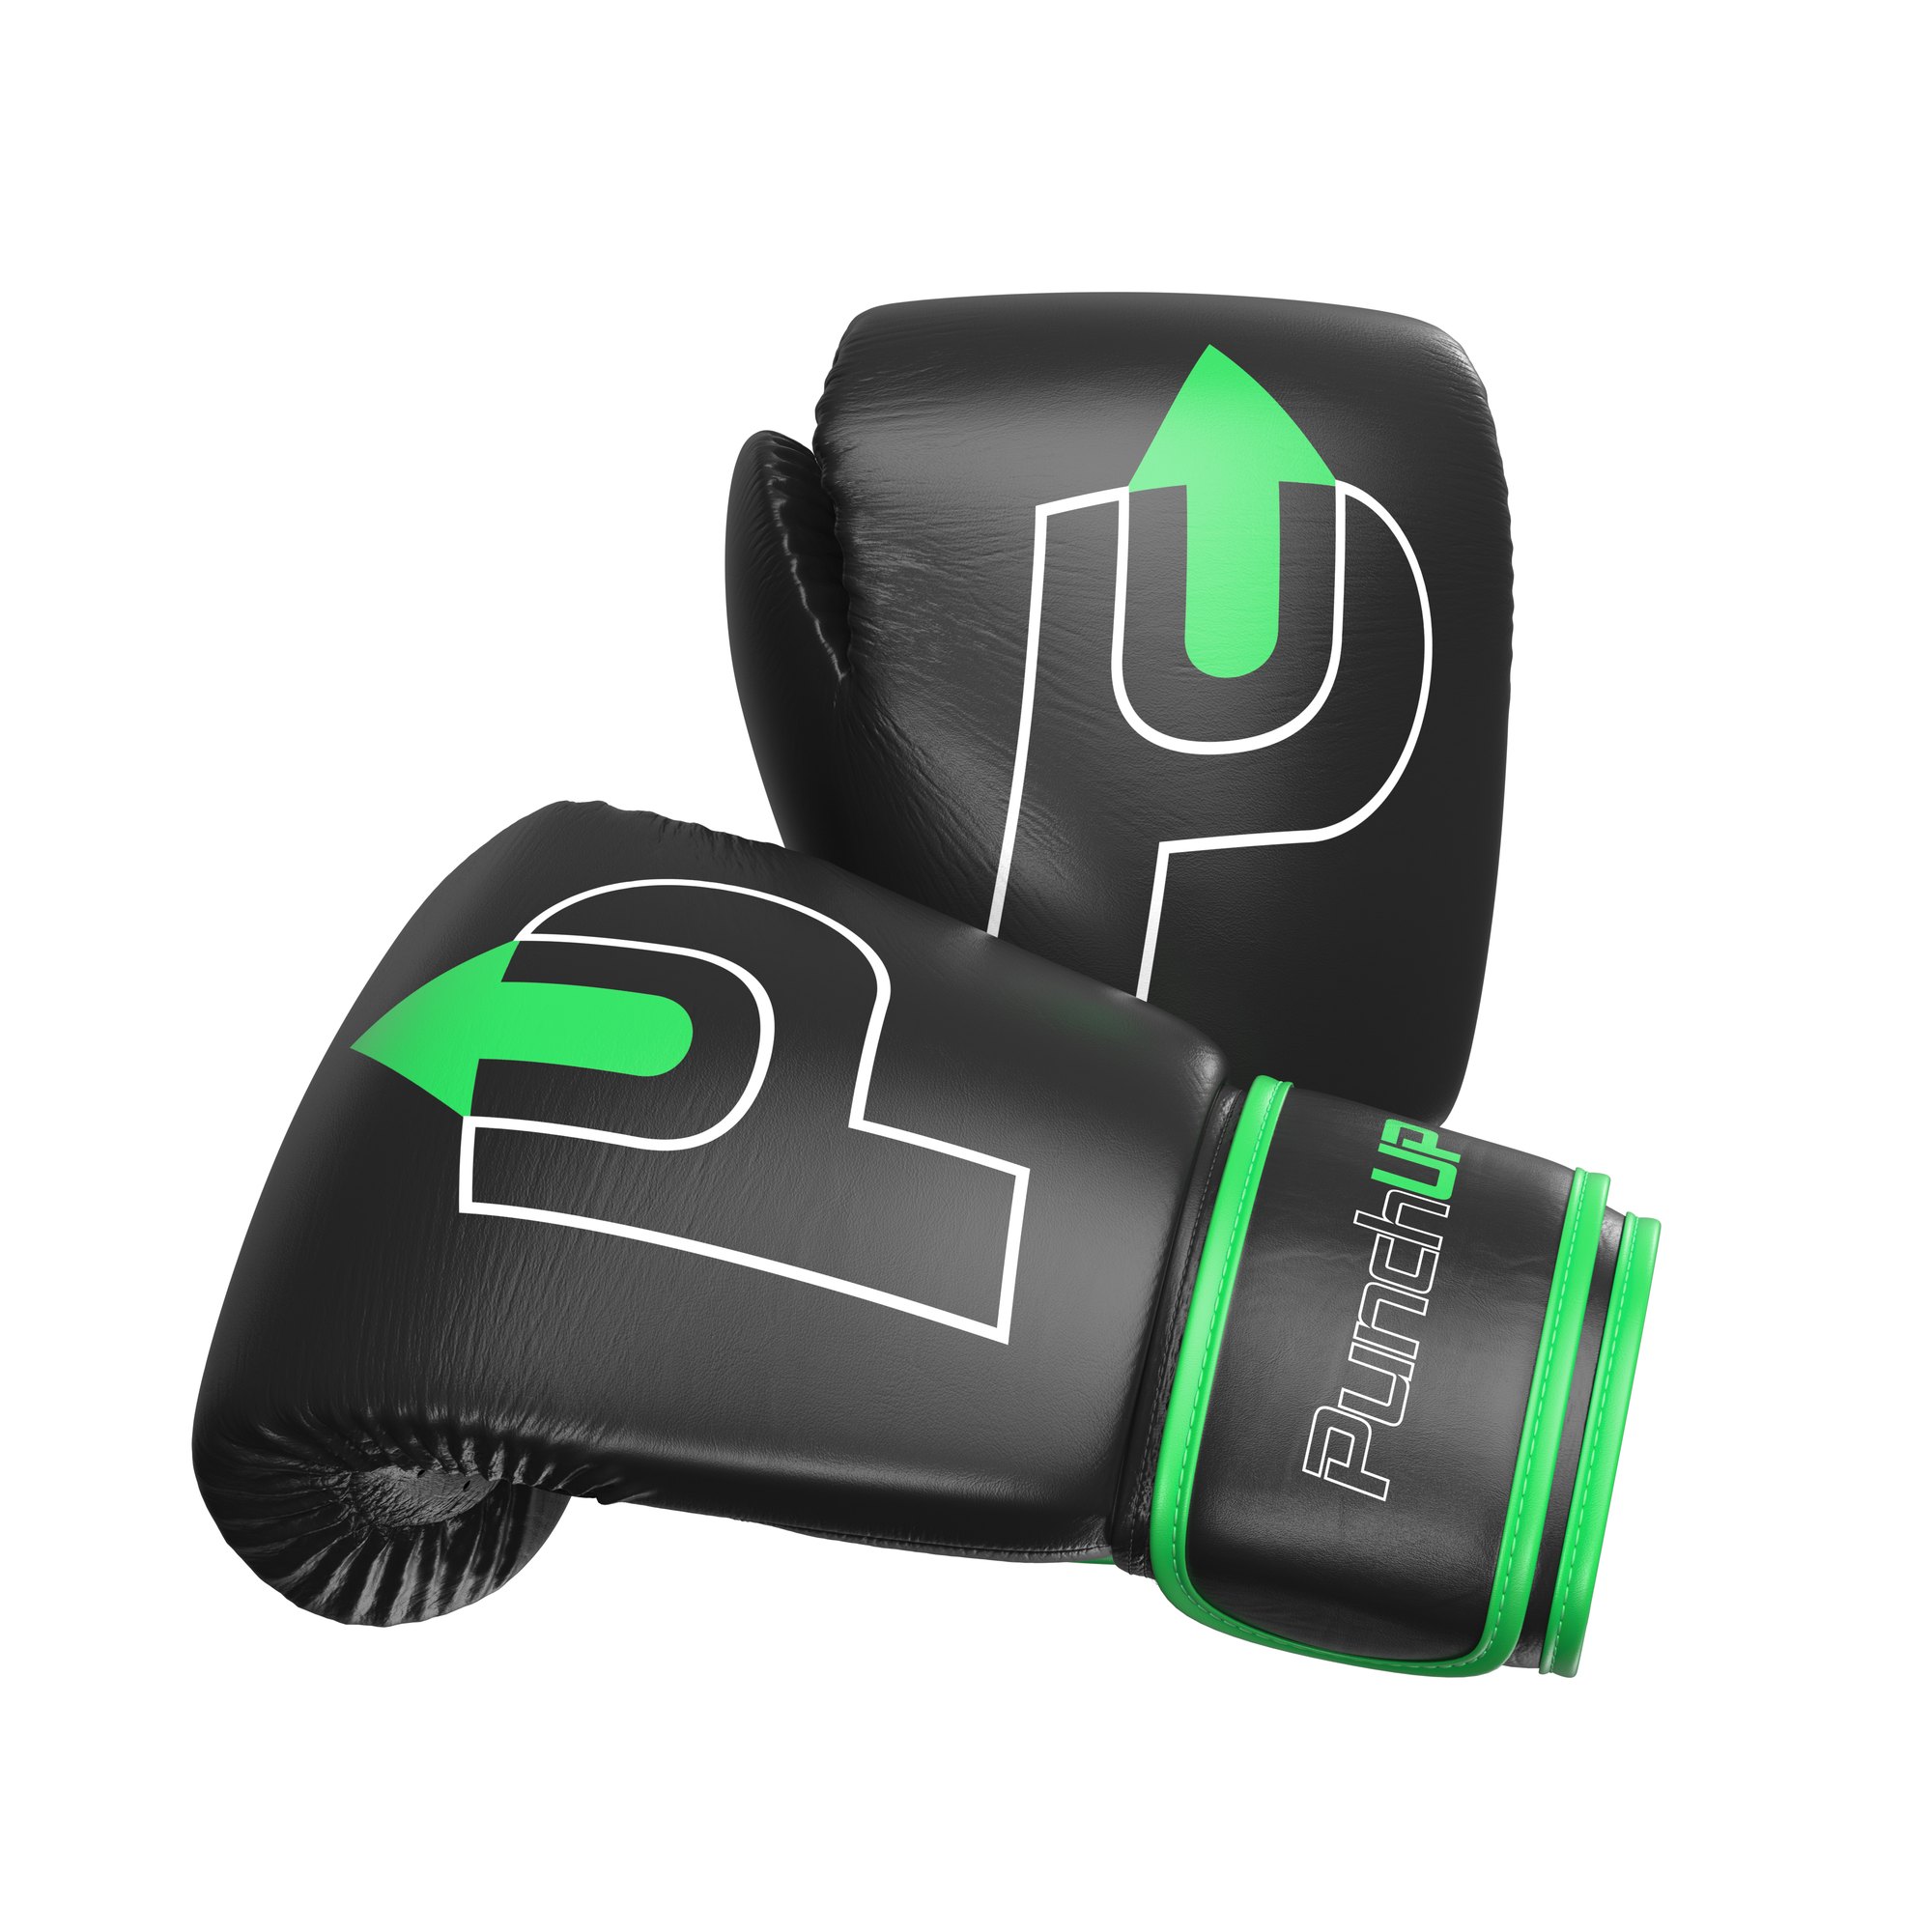
A third angle, one glove resting on the other.
- Supplied: phone photographs of the real gloves and the brand artwork
- Built: one model with separate materials for leather, trim, strap and metal
- Delivered: silo renders on white at three angles, ready for a store listing
- Category: sports equipment, the same pipeline as our 3D product modeling services
Cordless drill: one catalogue photo in, a studio render out
This project started from less than anything else on this page. The reference was a single product photo lifted from a distributor listing: 500 pixels square, a flat side profile, and that was the whole brief. No CAD, no sample on the desk, no studio shots. A tool has moulded grips, vents, a metal chuck and printed markings, and every one of those had to be read off one small image.
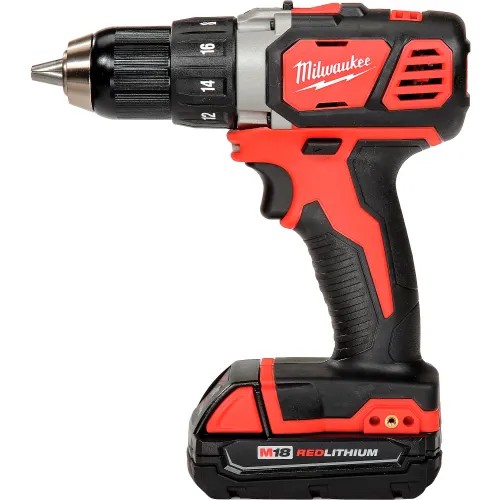
The reference: one catalogue photo, 500 pixels square. Everything came from this.
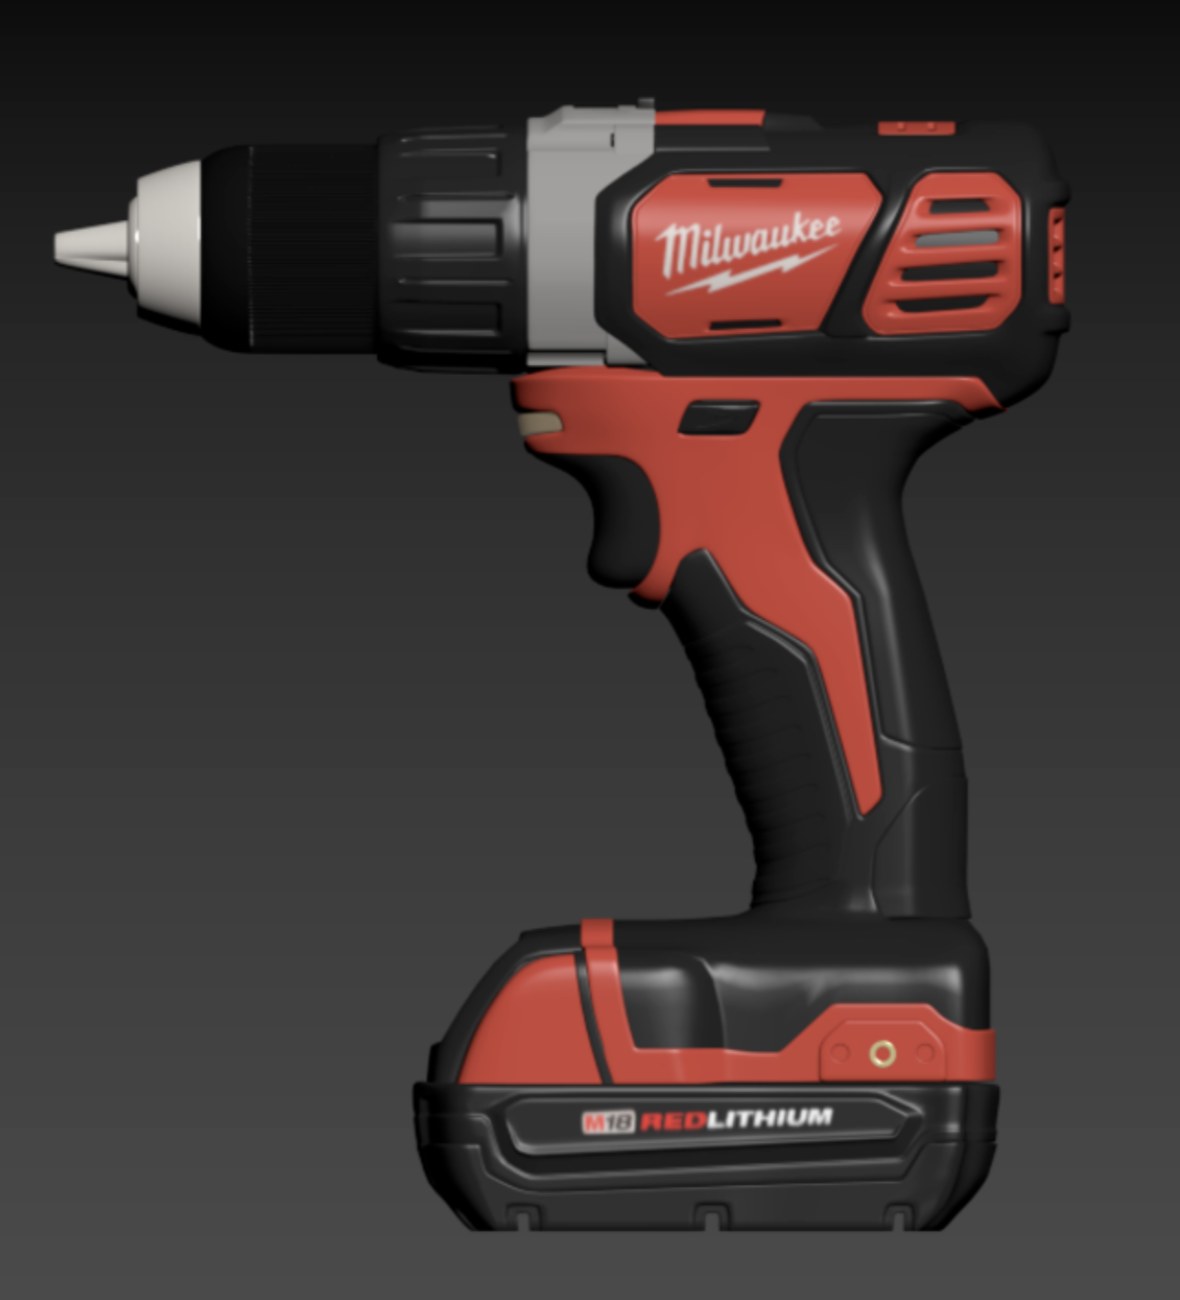
The finished model in the viewport, textured, before it goes to a render setup.
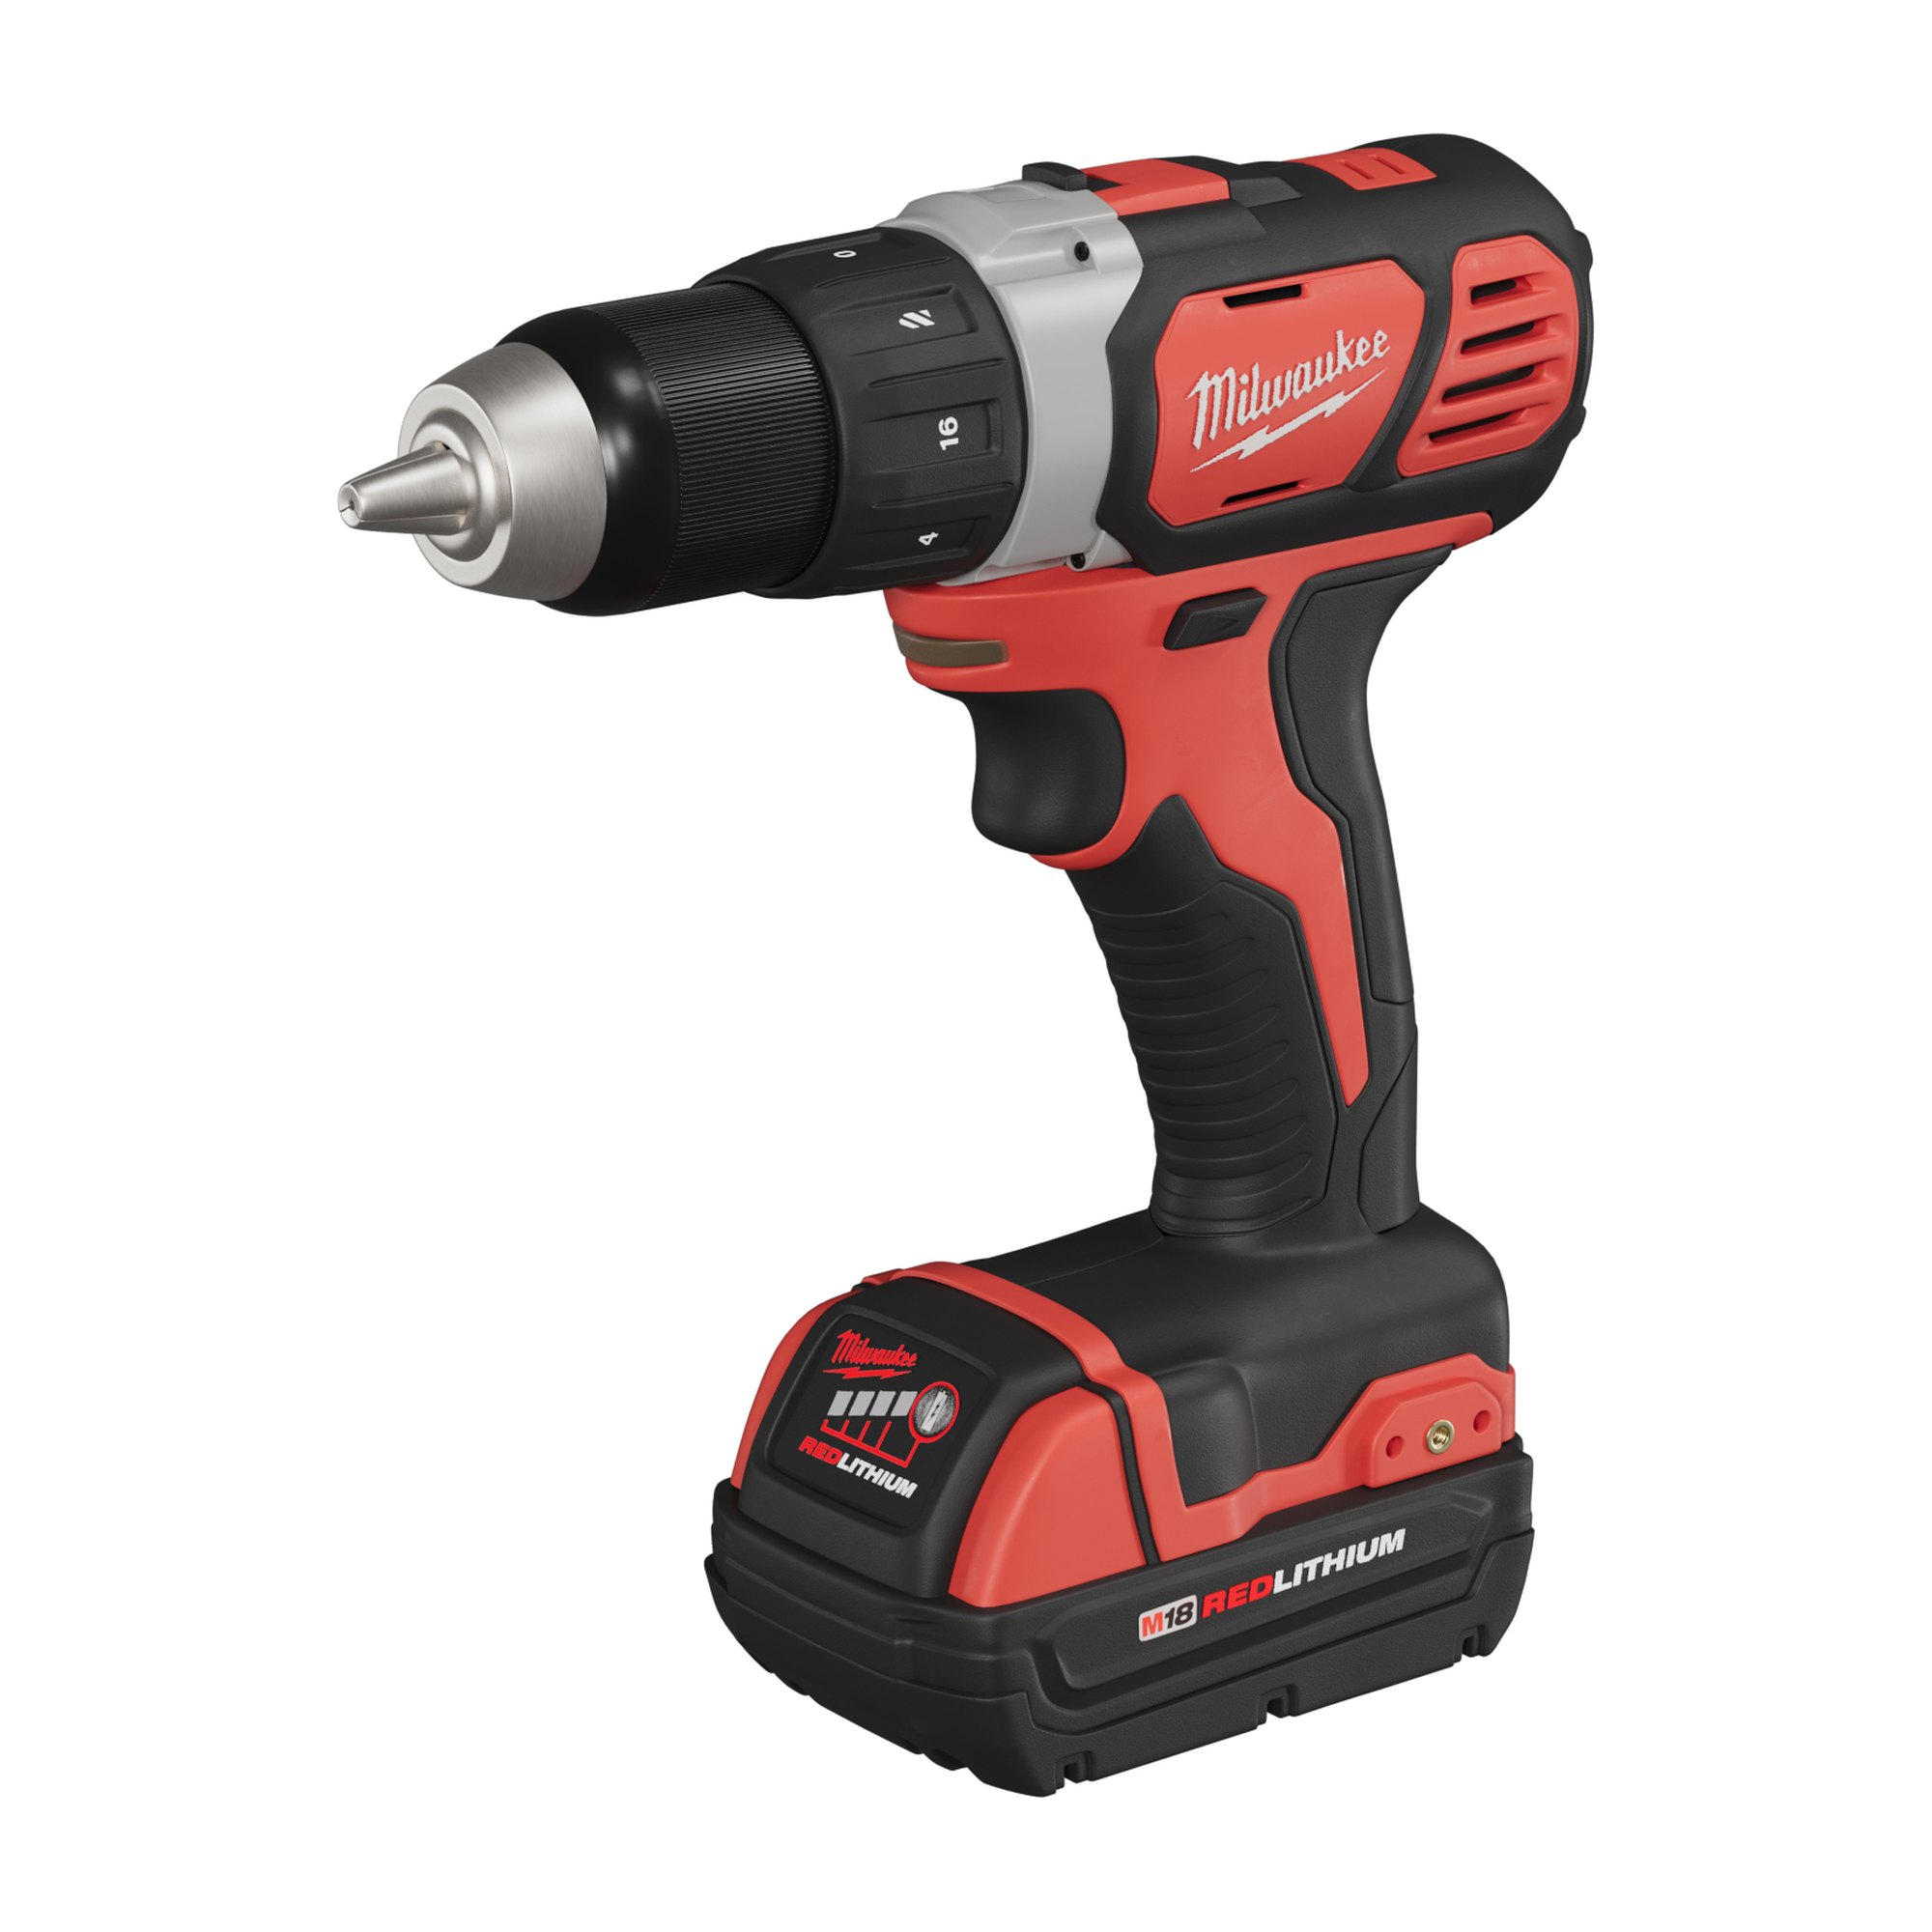
The delivered render, 2500 pixels square and lit as a studio shot.
The point of the three above is the last step. The reference is a flat side profile, because that is the one photo the listing had. The delivered image is a three quarter view, because once the model exists the camera is a setting rather than a shoot. That is the whole difference between owning an asset and owning a picture.
- Supplied: one 500 px catalogue photo, no CAD and no physical sample
- Built: a hard surface model with separate parts for housing, grip, chuck and battery
- Delivered: a 2500 px render at an angle the reference never had
- Category: tools and equipment, close neighbours of our appliance work
Diamond ring: the client sent CAD, not photographs
Every project above started from pictures. This one is the opposite case, and it is the one jewellery brands usually arrive with. The brief was a Rhino file straight out of the jeweller’s CAD, exact to the hundredth of a millimetre: a cushion cut centre stone 9.40 by 7.32 mm, a hidden halo of twenty two round diamonds about 1.22 mm each, and a shank 16.60 mm across the inside, which is a UK size L. Nothing here is open to interpretation. The job is to honour the geometry, not to guess at it.
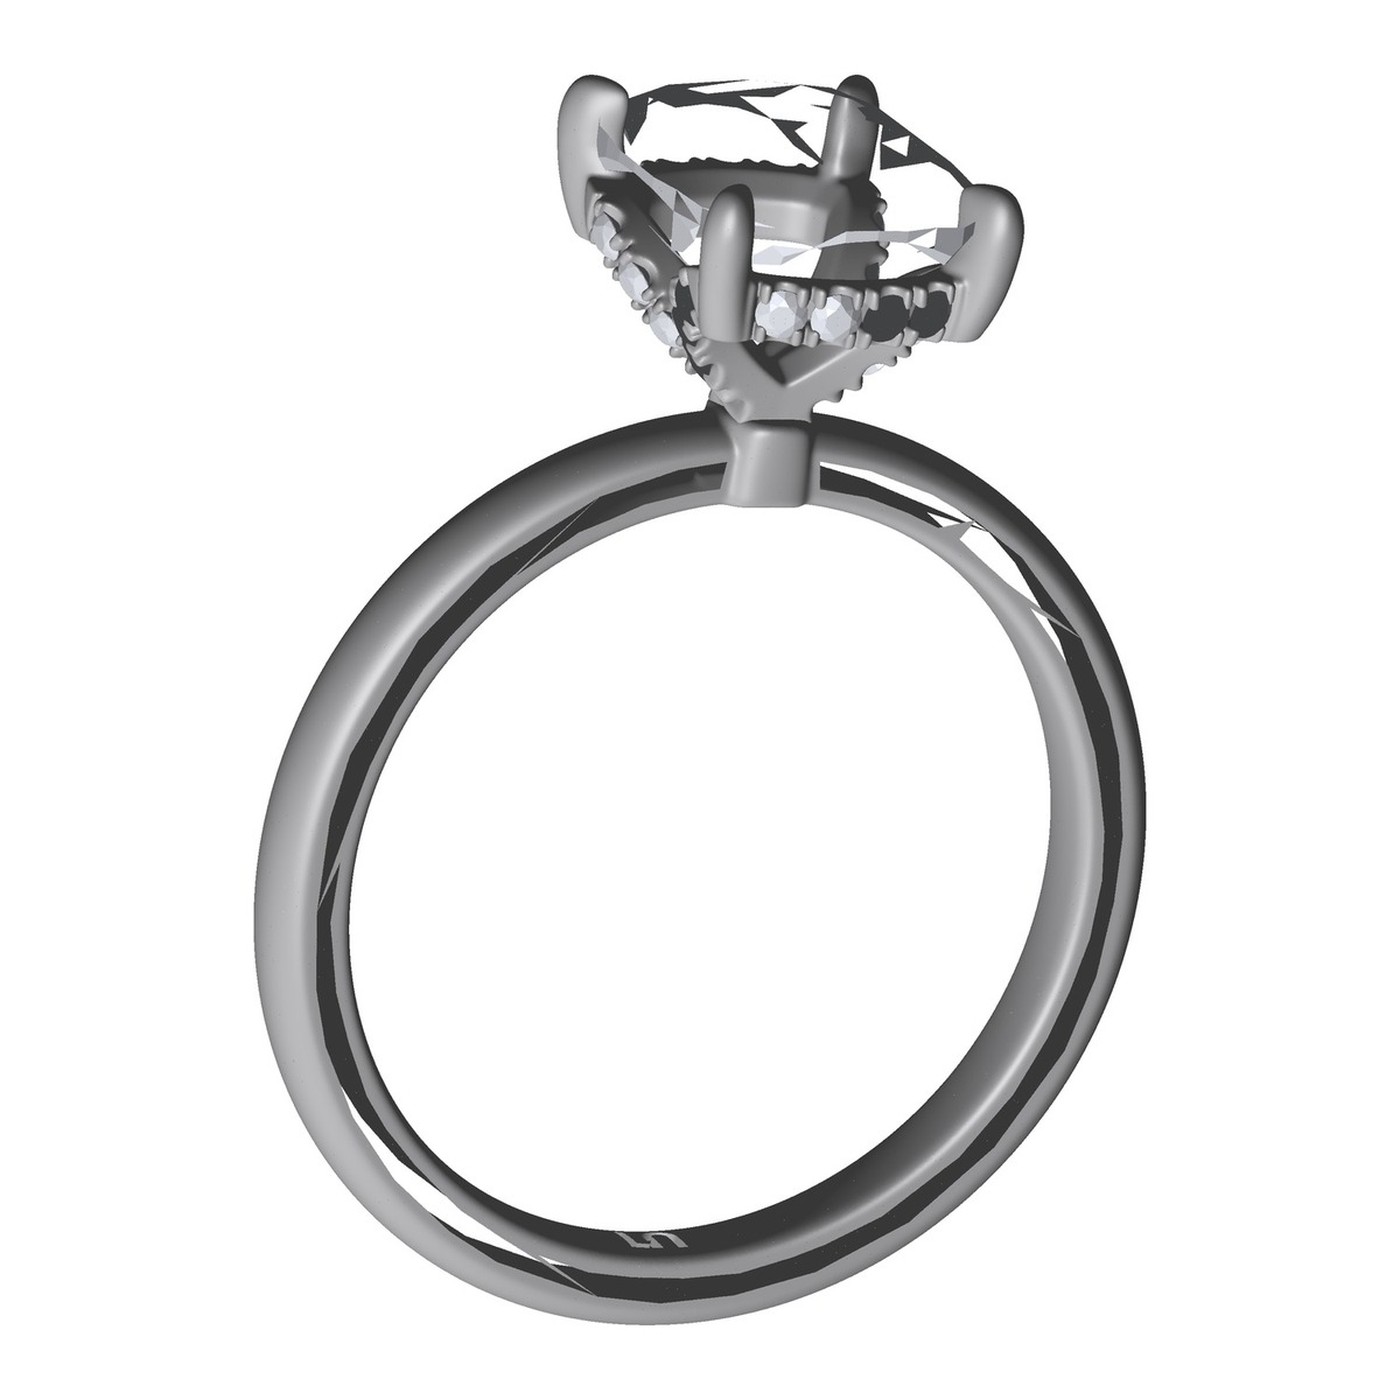
The supplied CAD model, rendered untextured so the geometry is all you see.
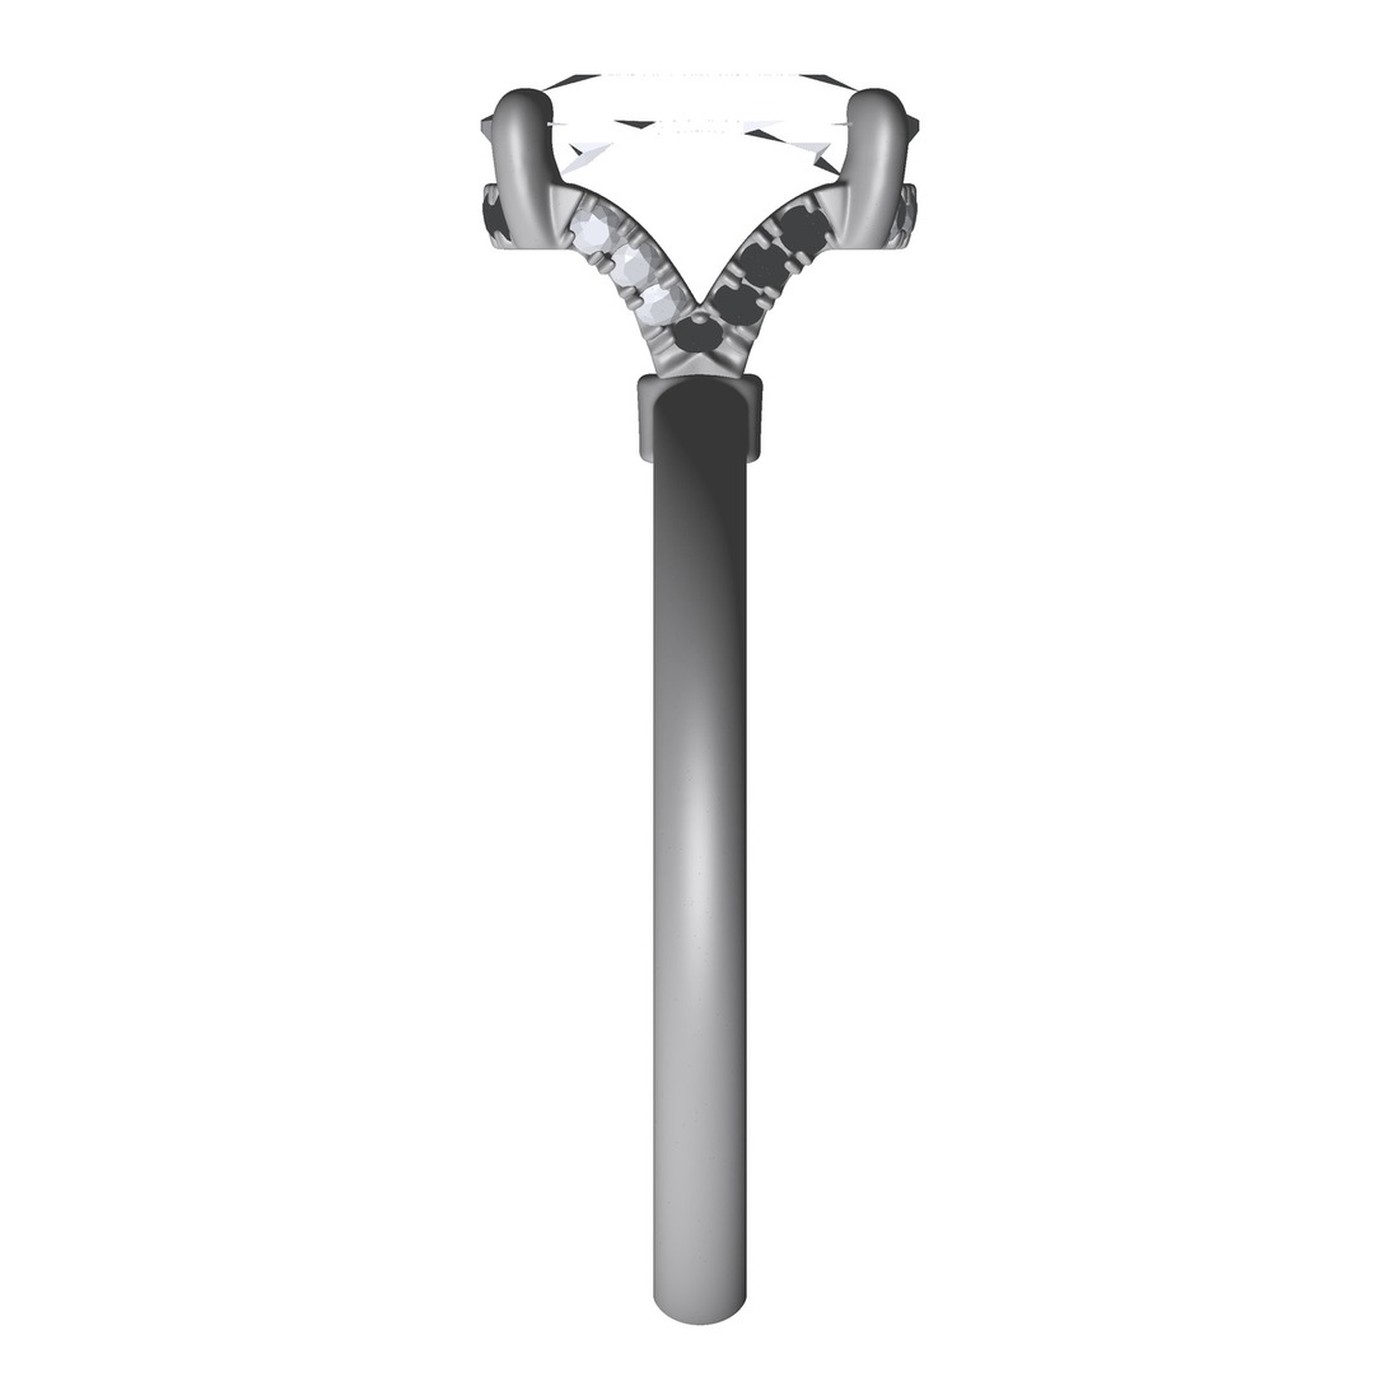
From the side: the shank stays slim, then flares out into the head.

The hidden halo, the row of small stones you never see from above.
A file like this is a gift and a trap at once. The measurements are settled, so nothing gets argued about later. But CAD carries no materials, no light and no context, and those are exactly what a shopper buys with. Everything below came out of that one file: two metals, three kinds of shot, no second setup.
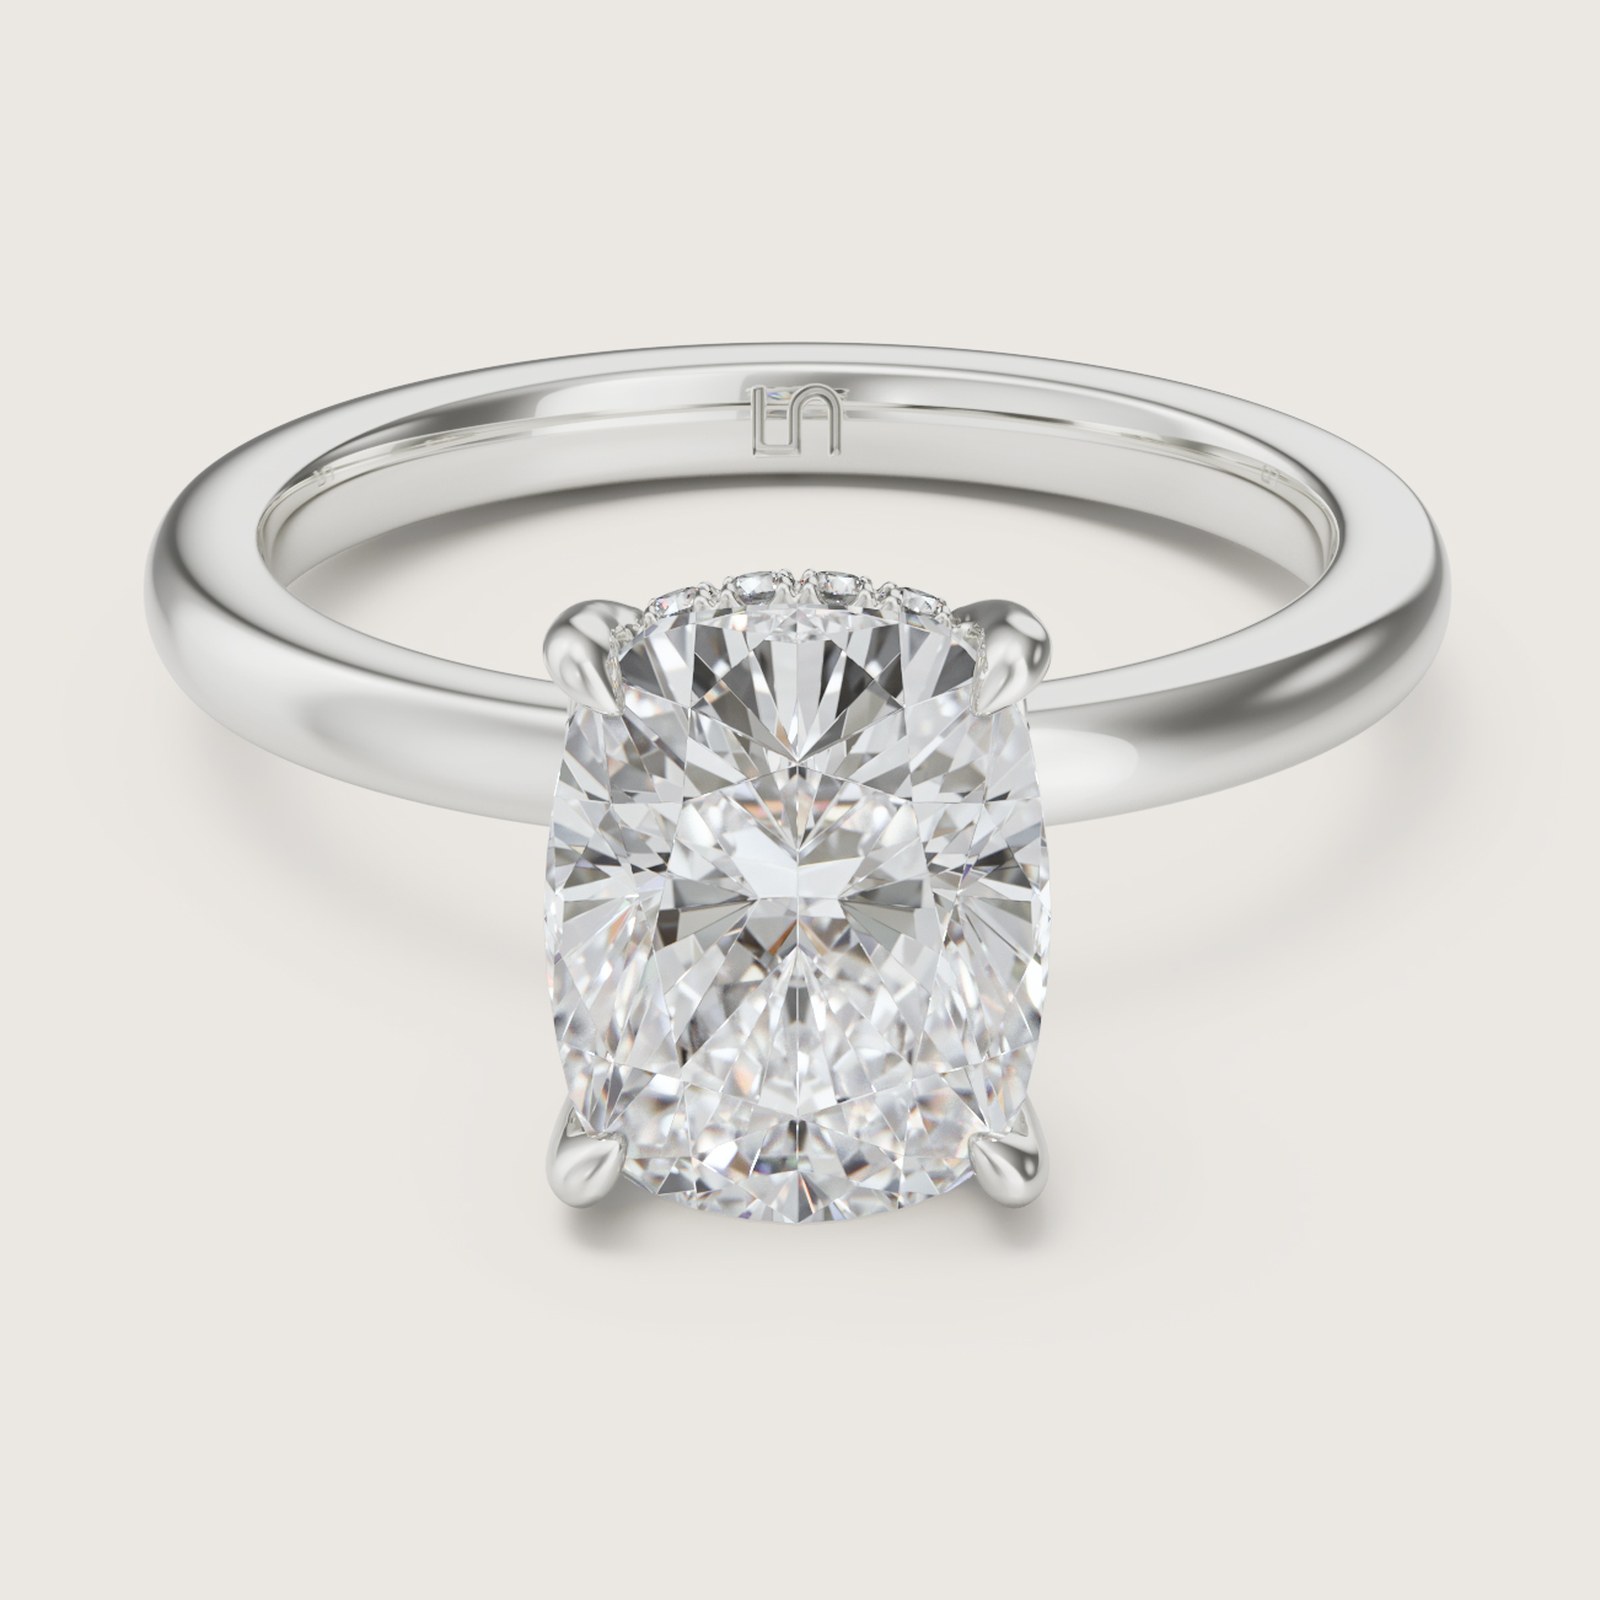
White gold: the straight product shot a listing needs.
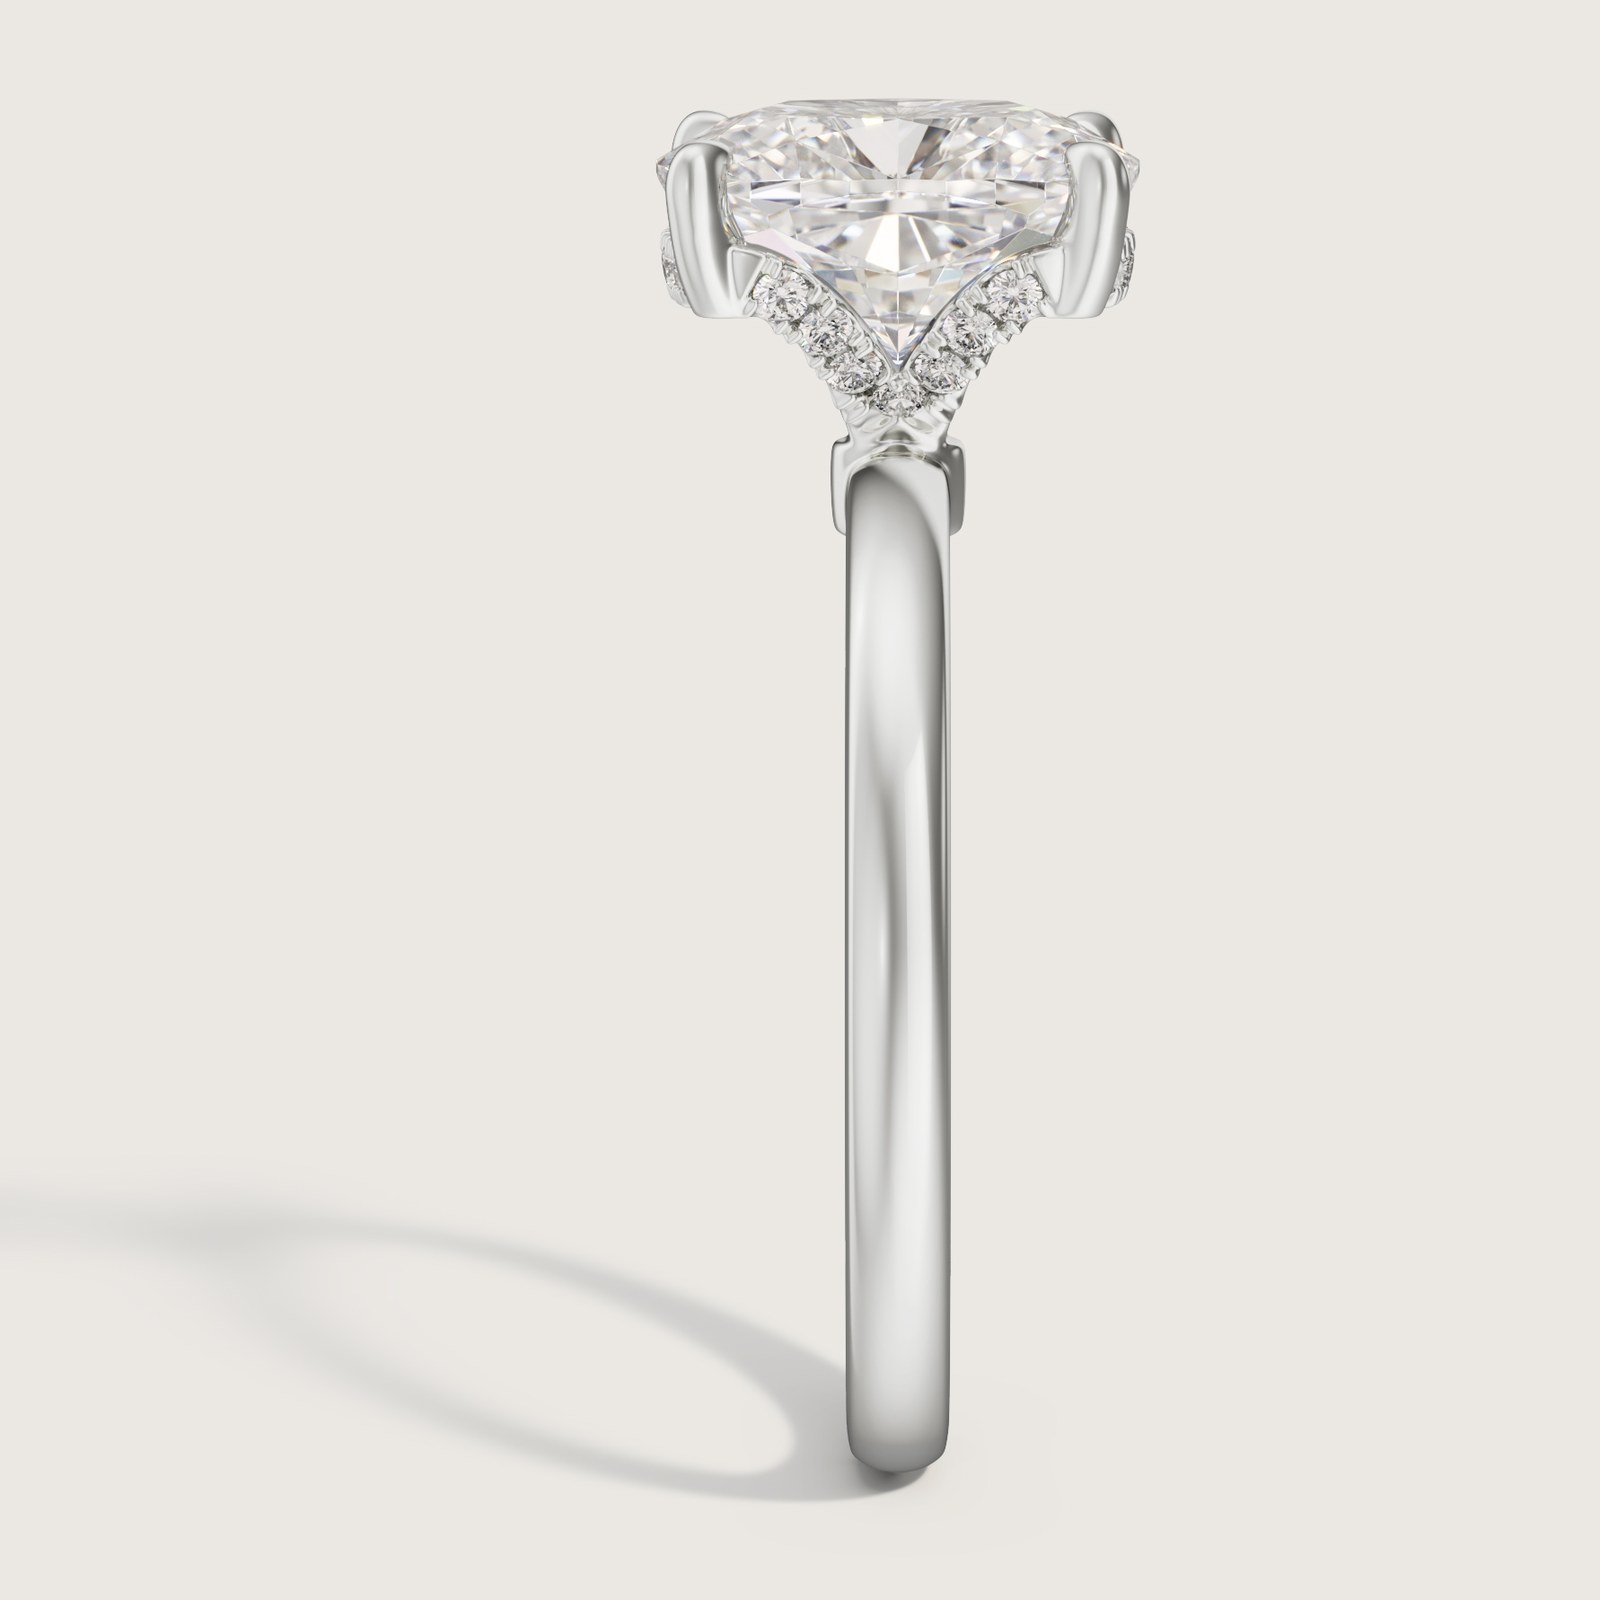
The side view, where the hidden halo finally earns its name.
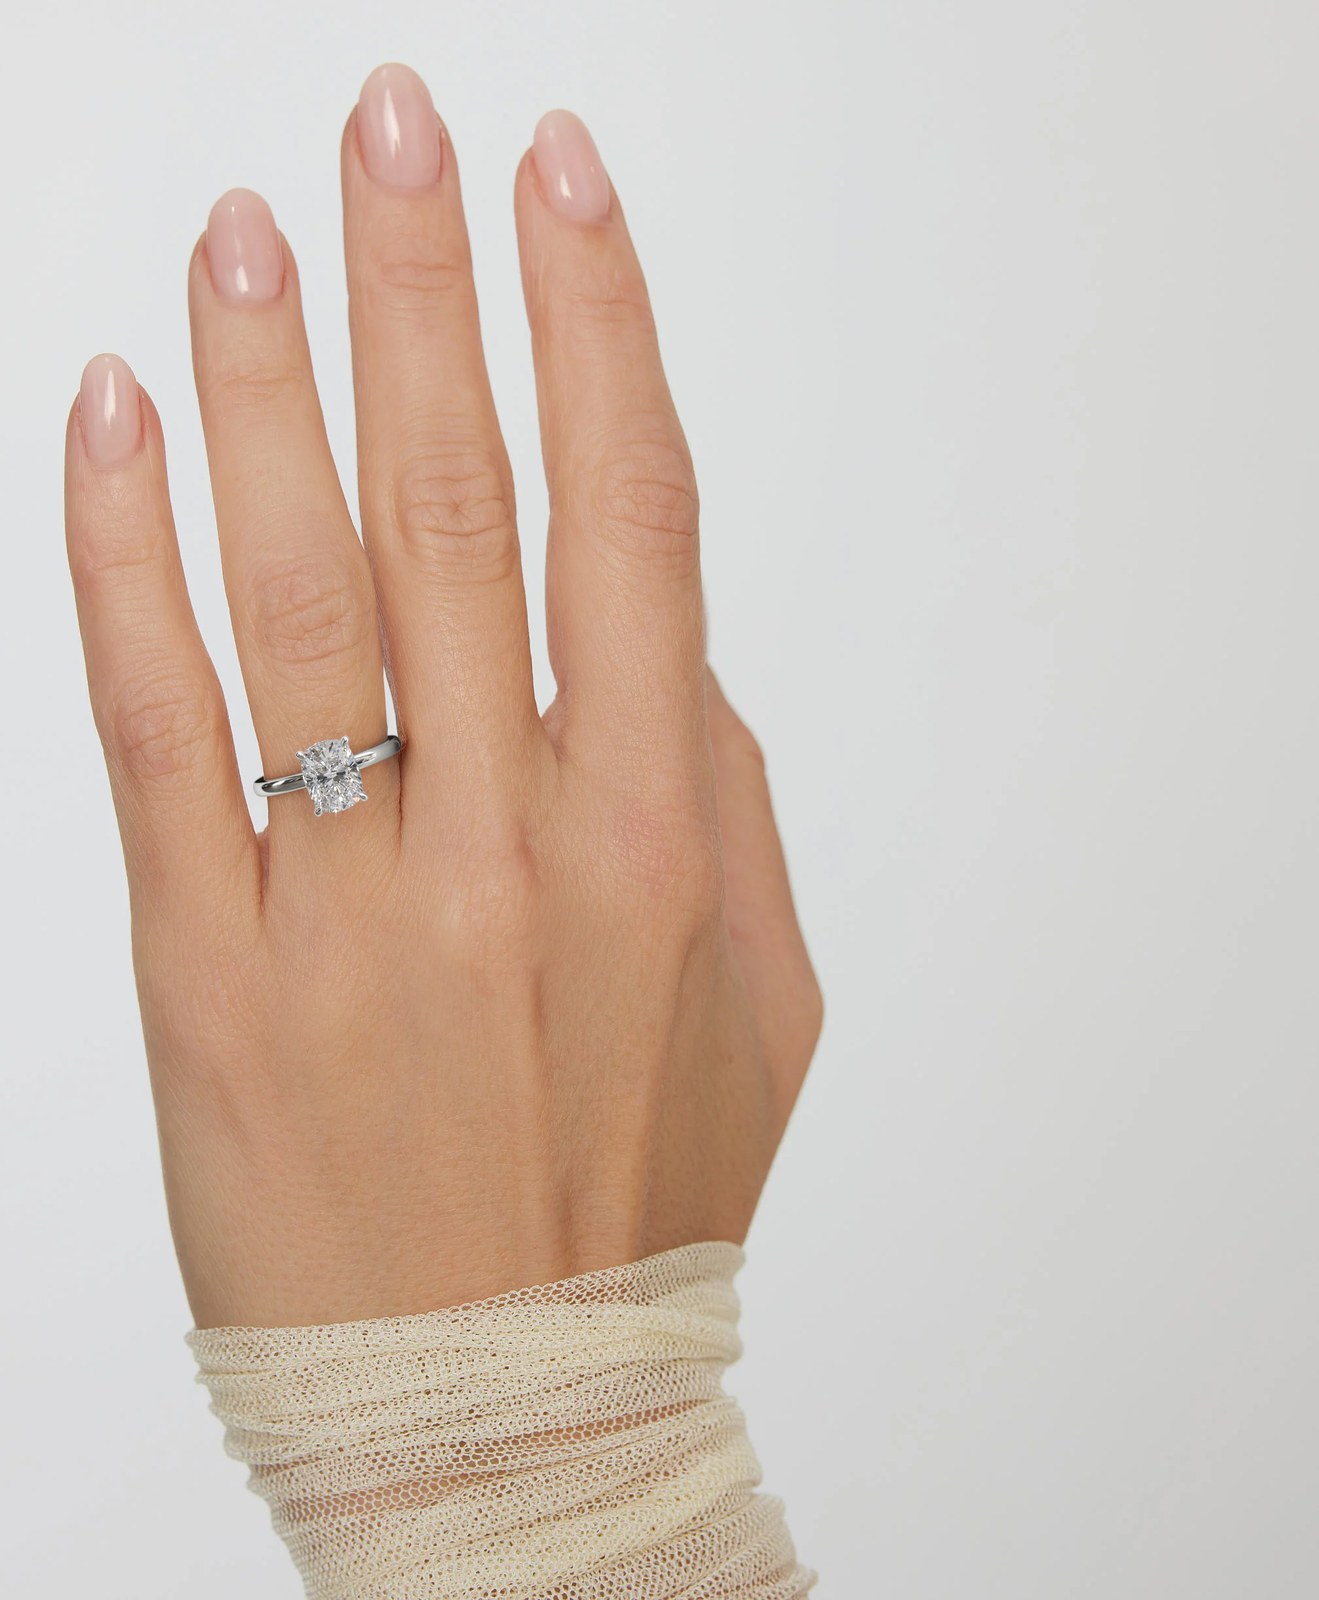
On a hand, rendered rather than photographed.
And now the same three frames again, with one material swapped. Same cameras, same lighting, same hand. No reshoot, because there was never a shoot.
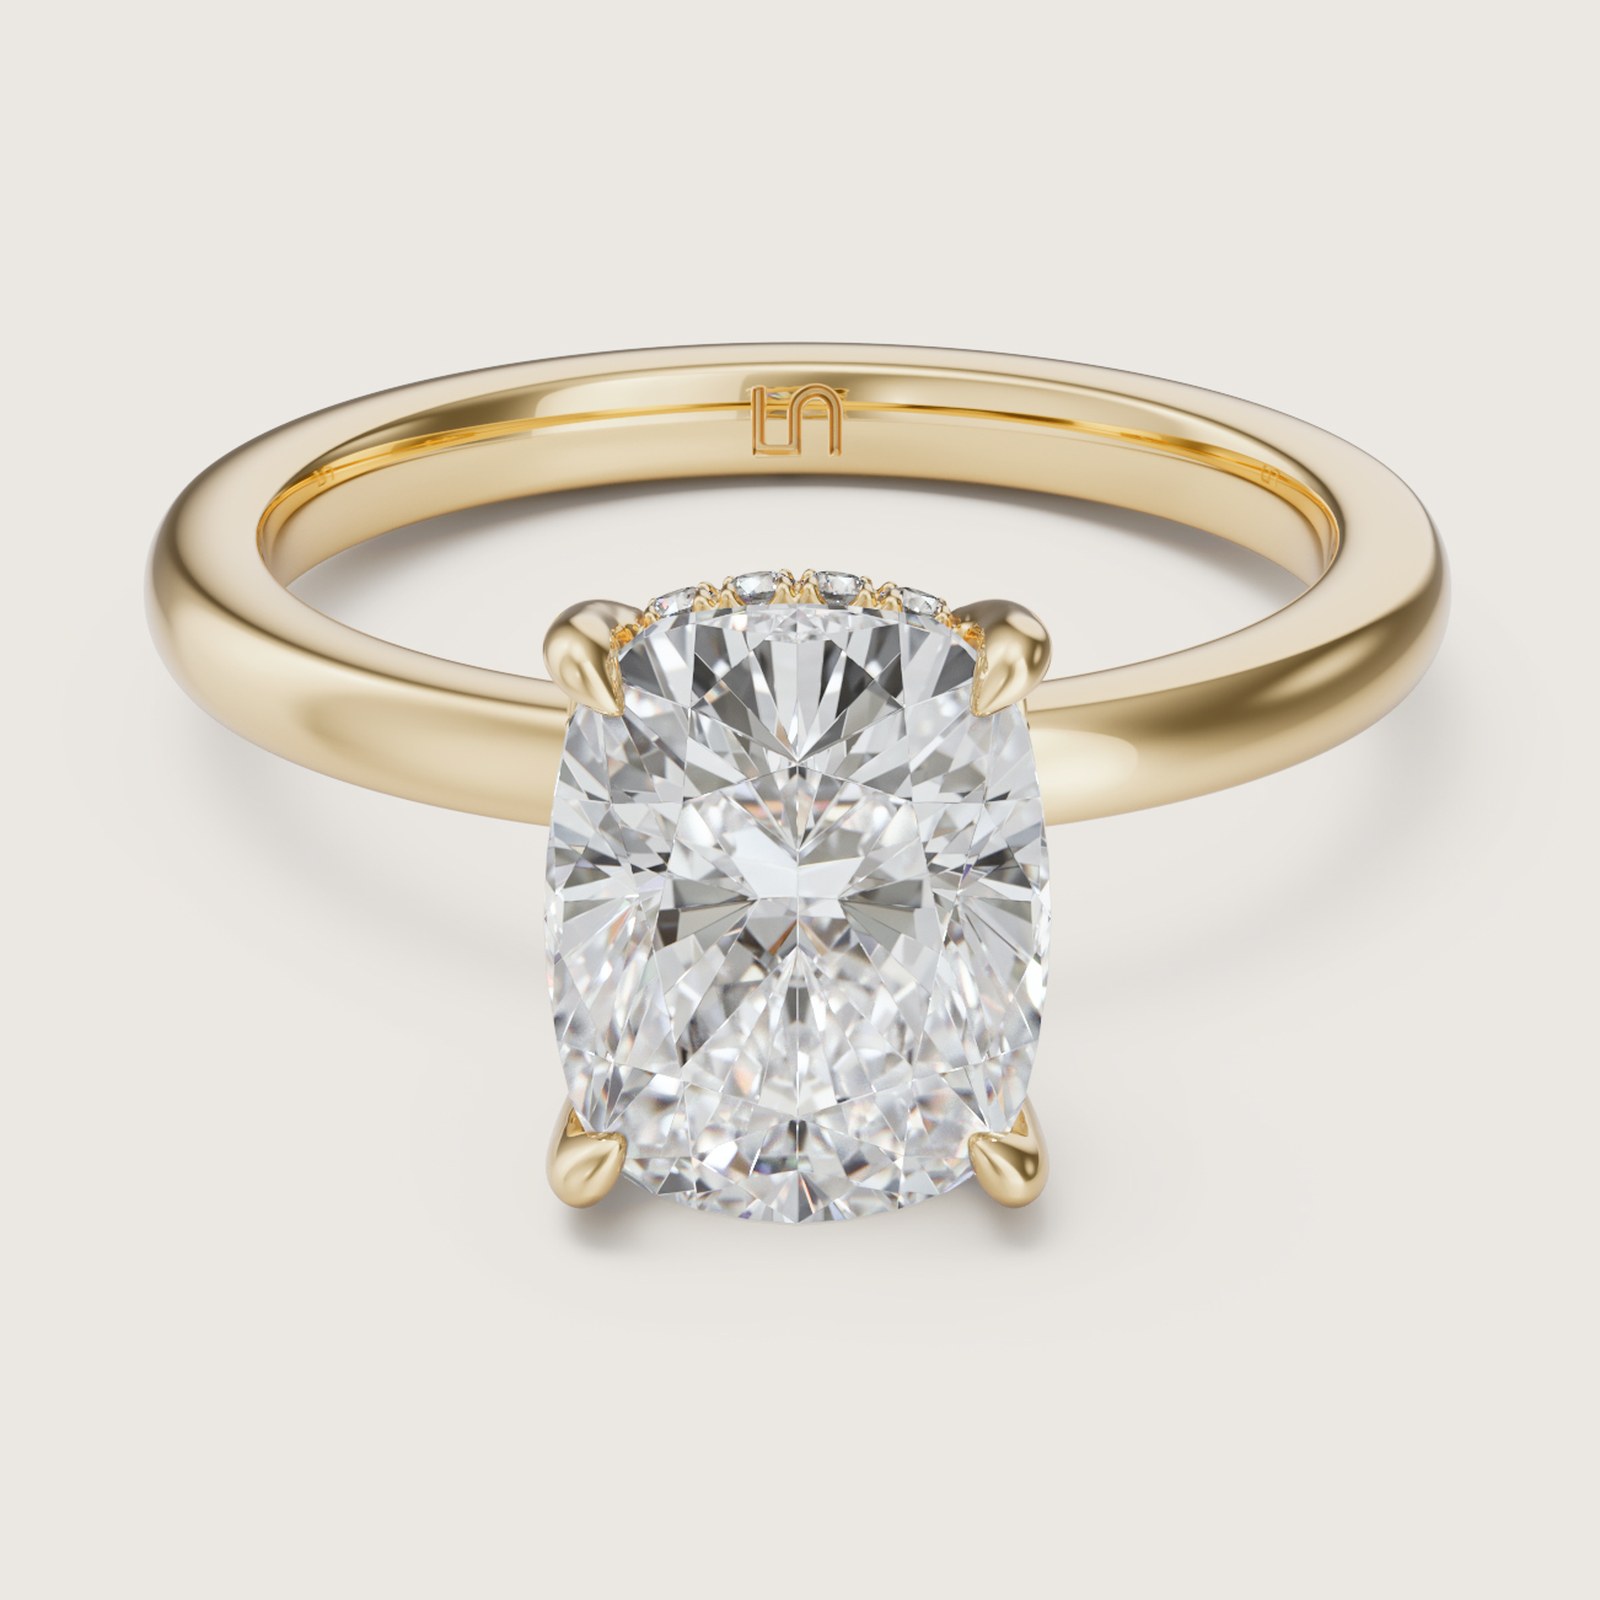
Yellow gold: a metal change is a material, not a remodel.
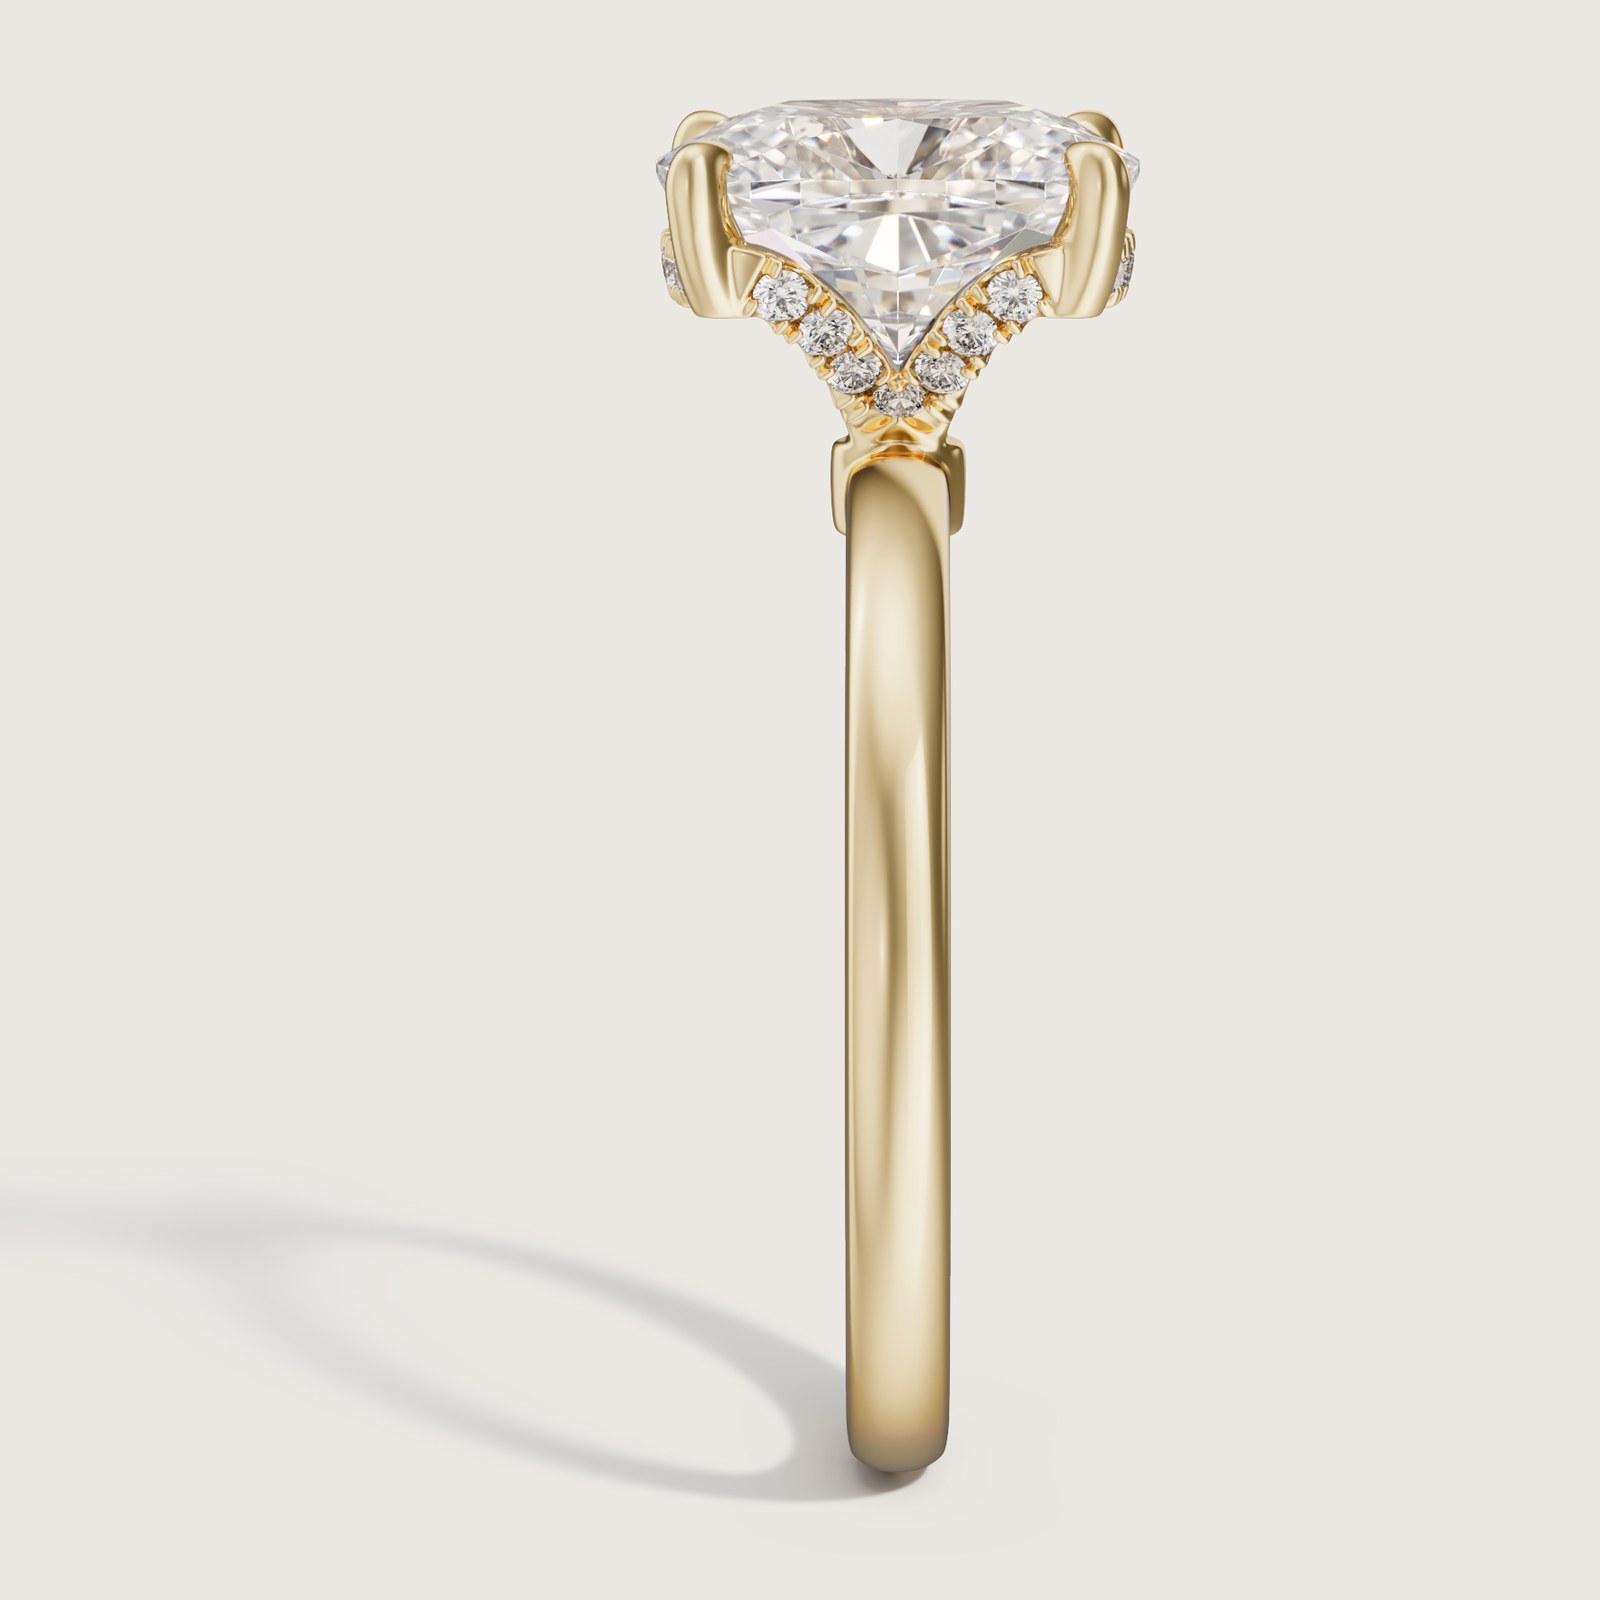
The same side camera, down to the shadow on the floor.

And the same hand, so a shopper compares metals, not photos.
- Supplied: a Rhino CAD file, no photographs and no physical sample
- Built: materials, lighting and a hand scene on top of the client geometry
- Delivered: three shots in two metals, six images out of one file
- Category: jewelry, where we usually start from CAD, as on our jewelry 3D modeling page
Cordless vacuum: one model, a whole campaign
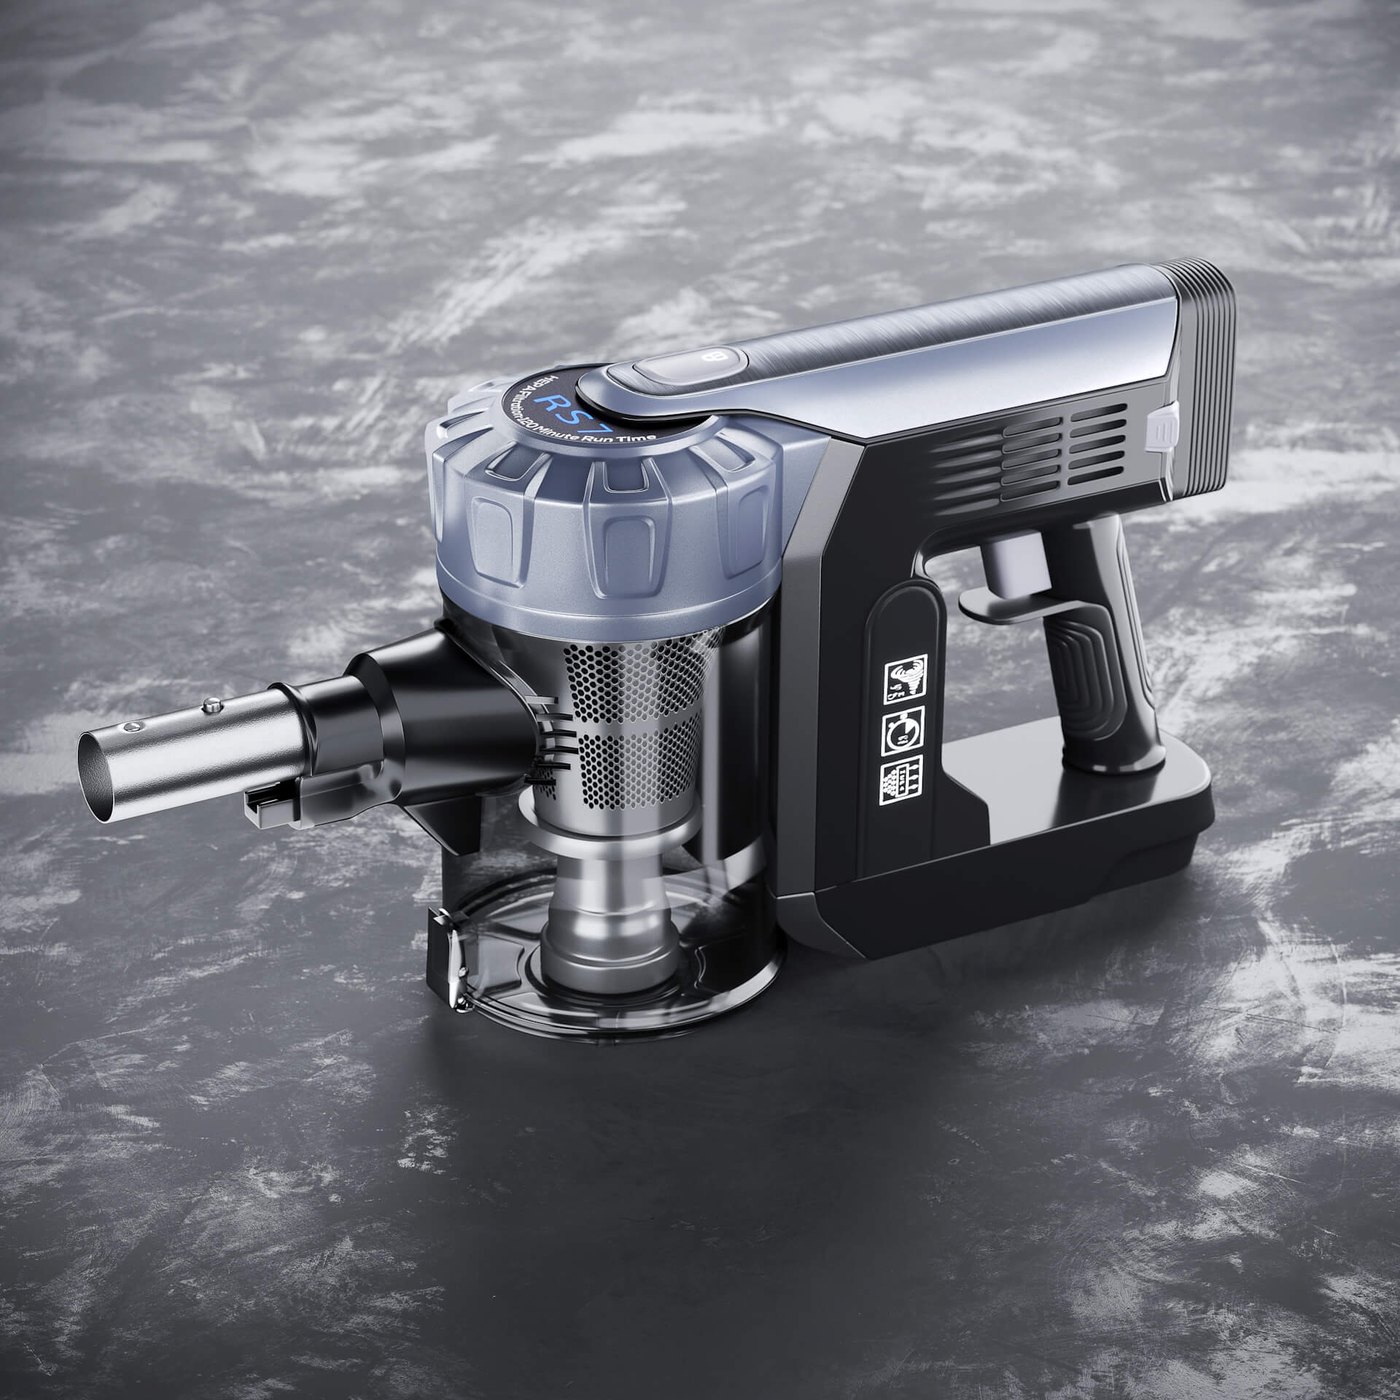
This is the example worth studying if you are weighing 3D against a photo shoot. The client sent reference photographs of a cordless vacuum. From the single model that came out of them we produced listing images, lifestyle scenes and marketing visuals, none of which involved a camera.
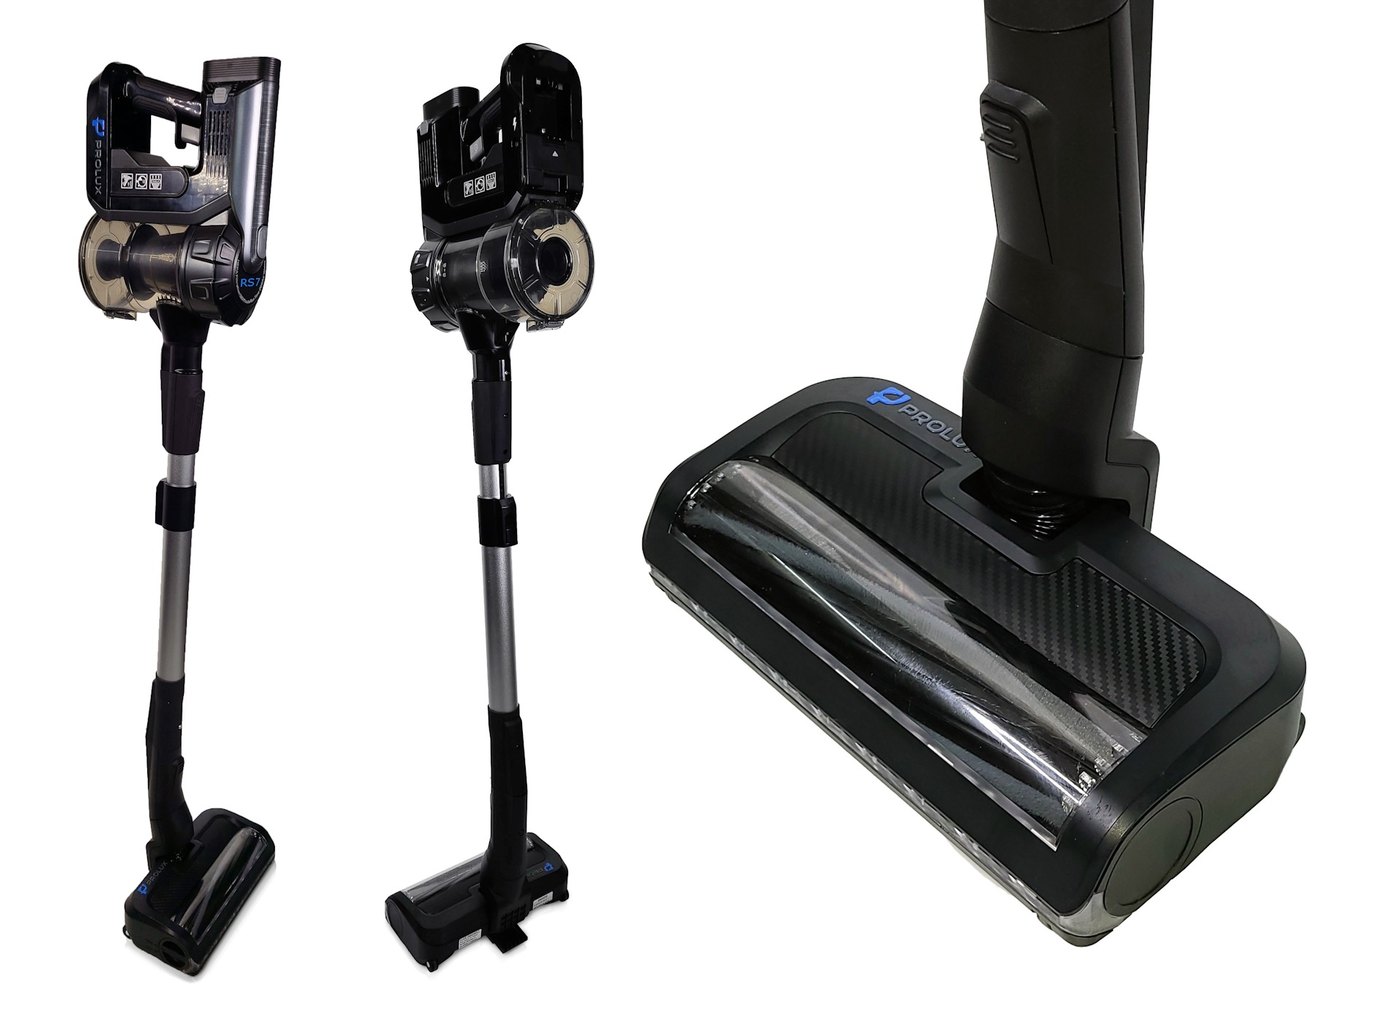
What the client sent: reference photographs of the physical vacuum, shot on a phone.
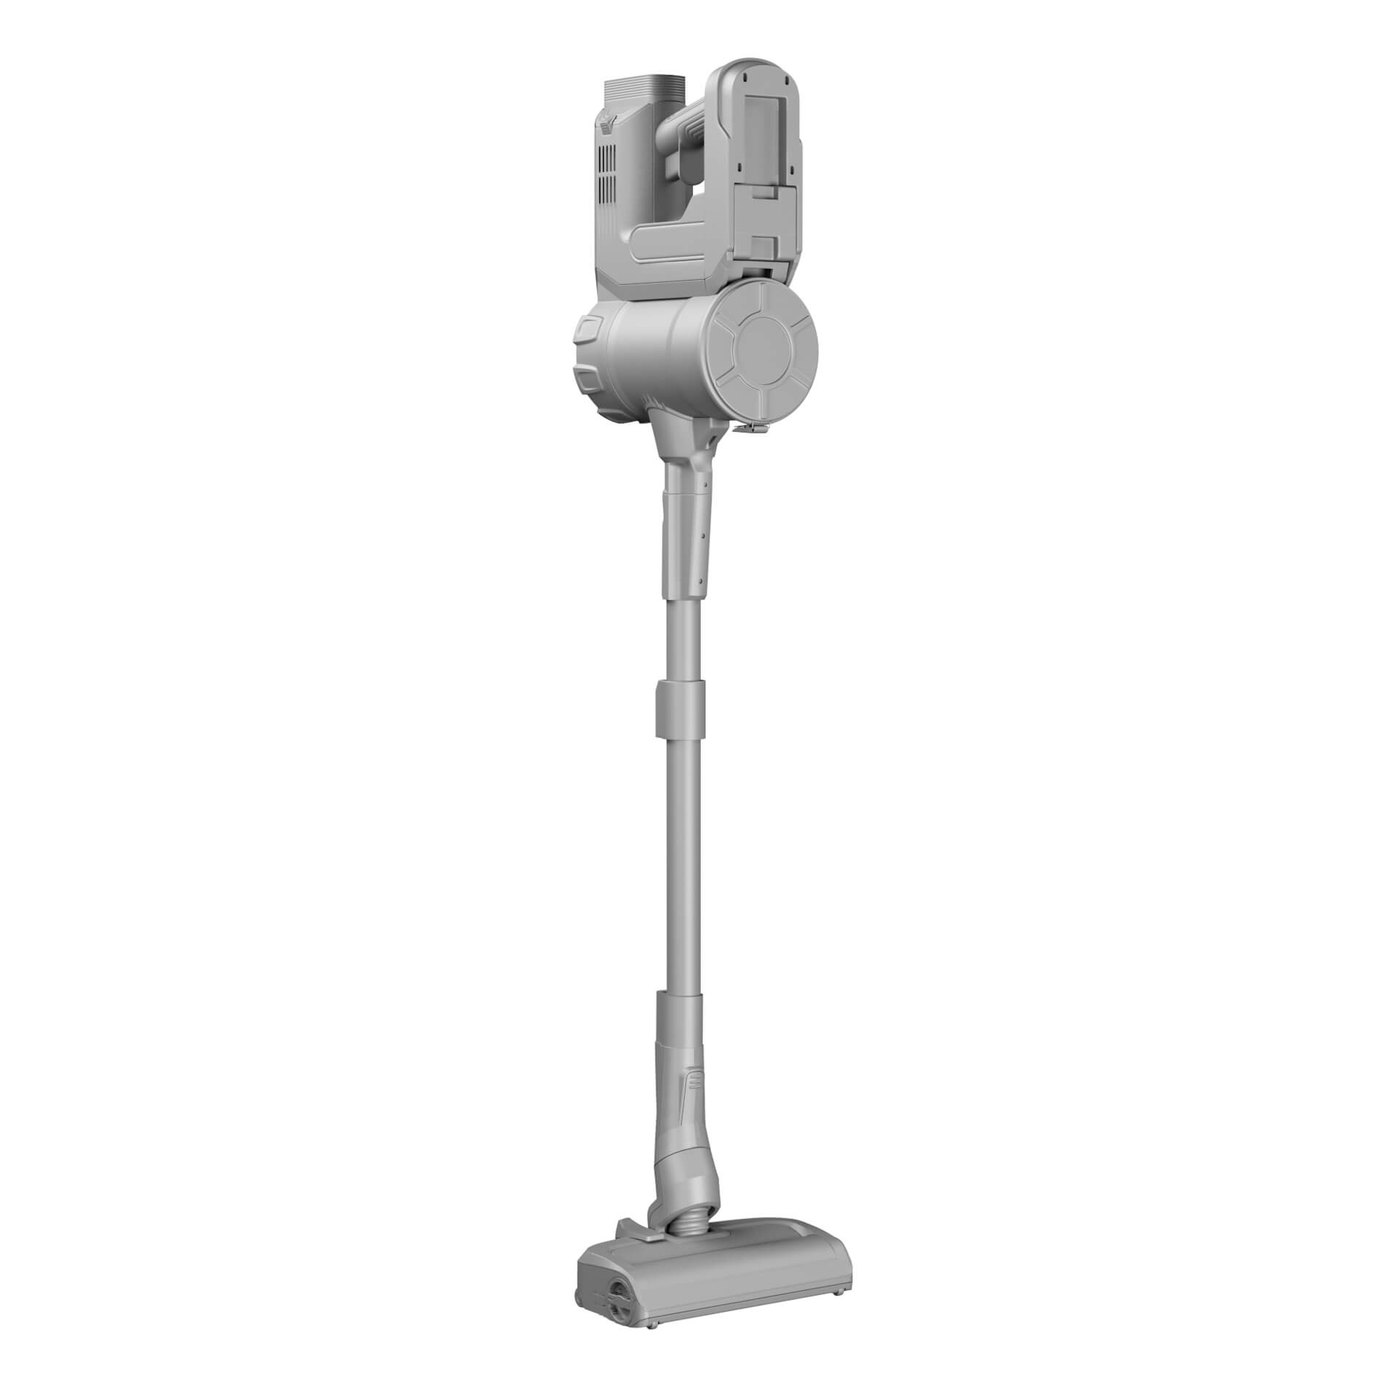
The untextured model, approved before materials. The cheapest point to change anything.
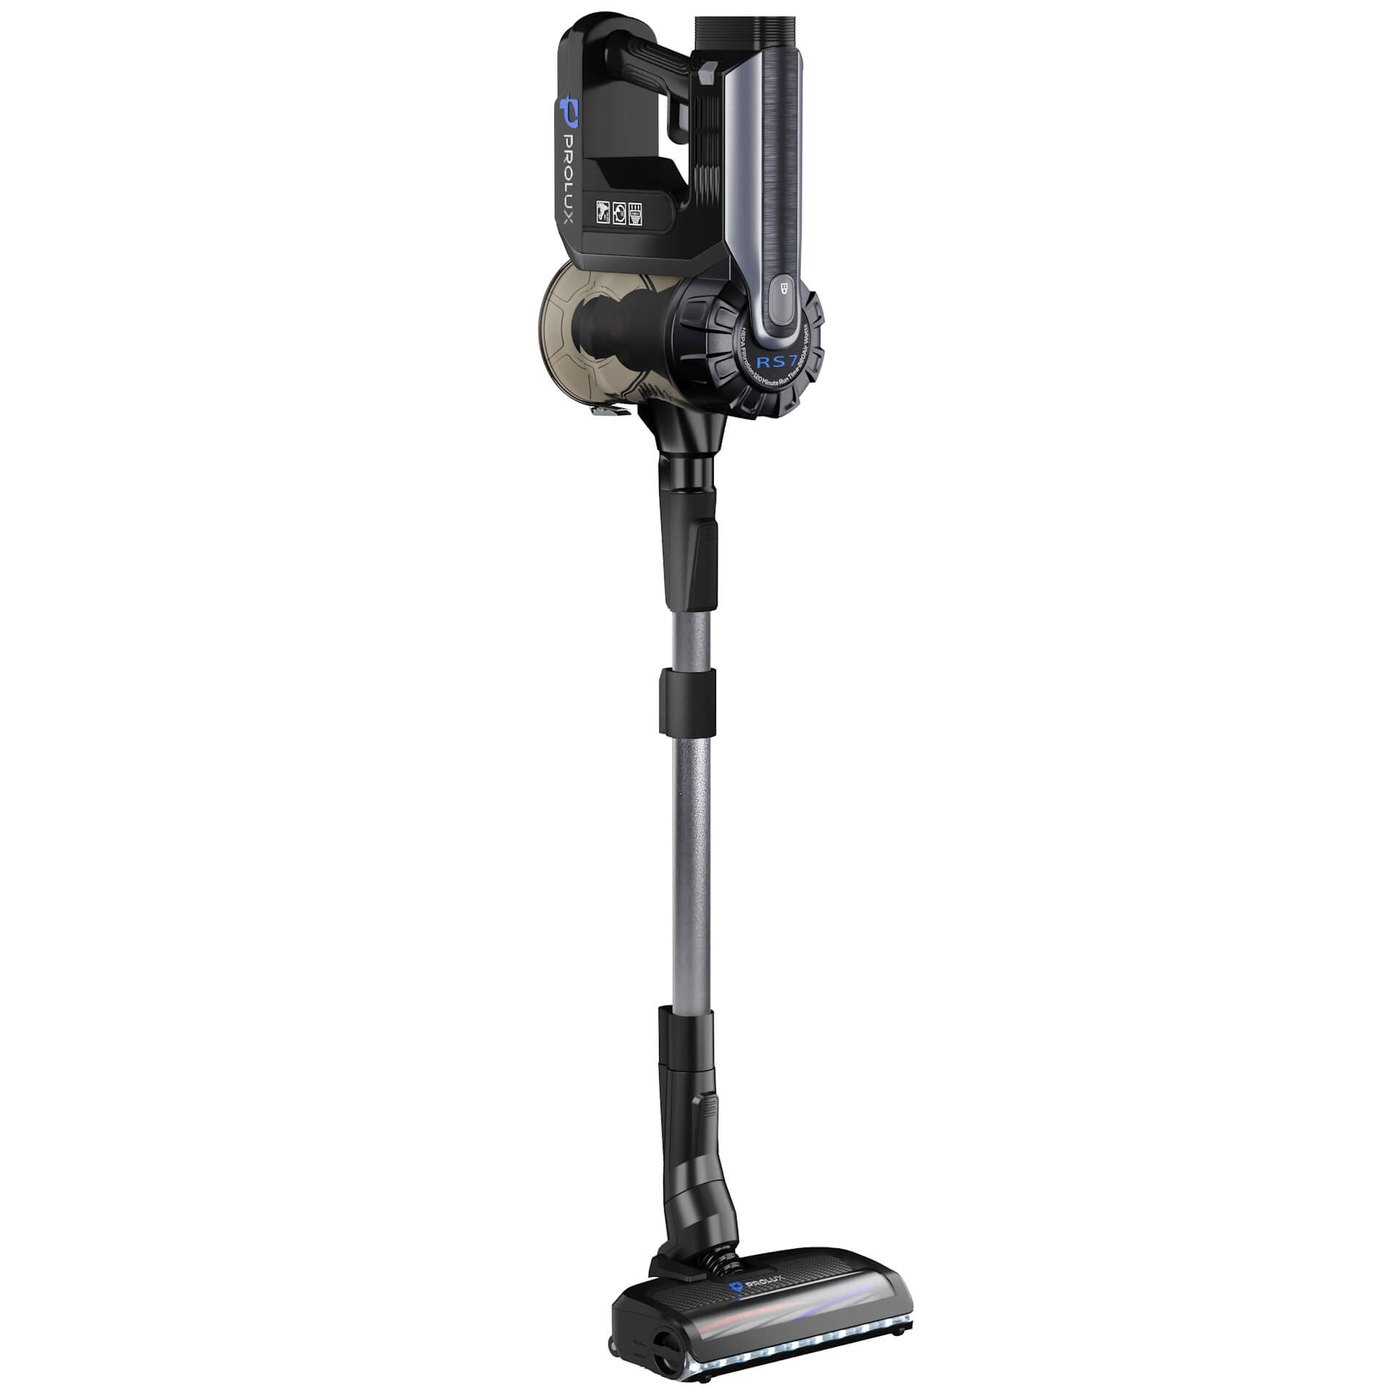
Silo render on white, the listing format every retailer and marketplace asks for.
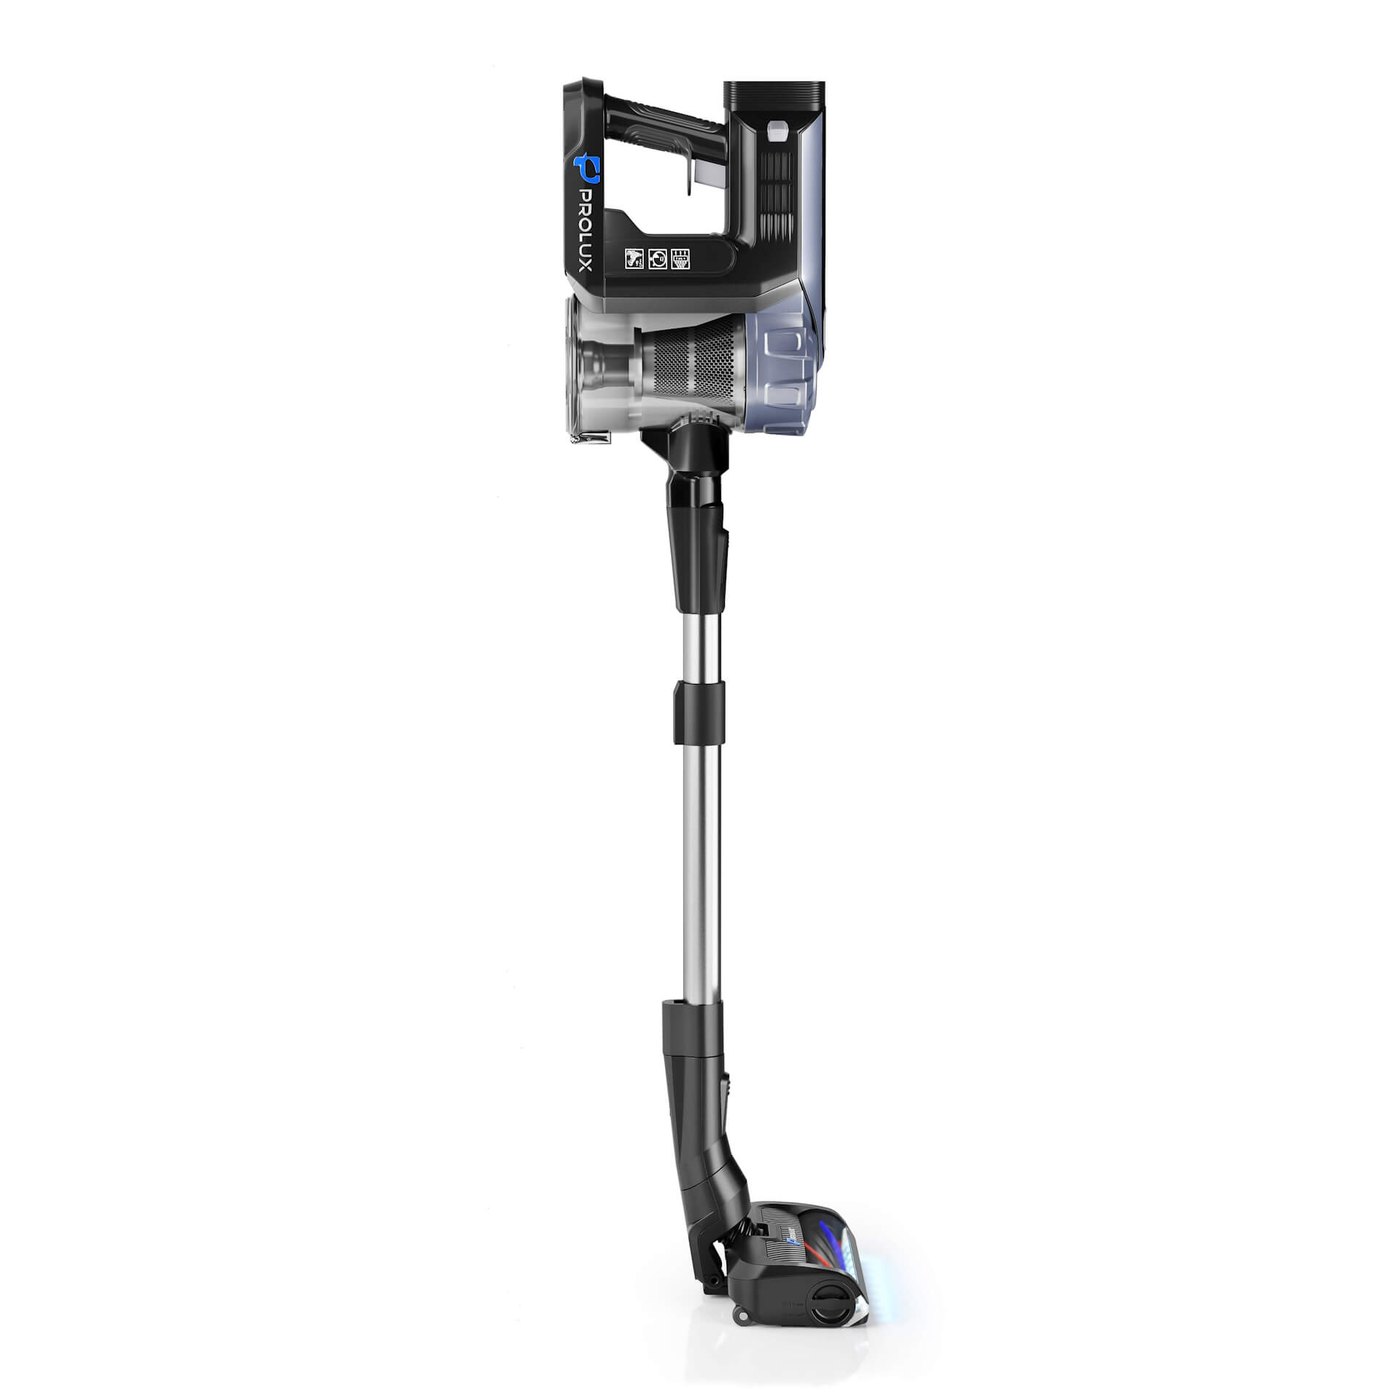
A second angle from the same file. That is render time, not another photo shoot.
The same model then produced everything the campaign needed, without the product going near a studio again.
A lifestyle scene built around the same 3D model.
An animation rendered from the same file. Click to play.
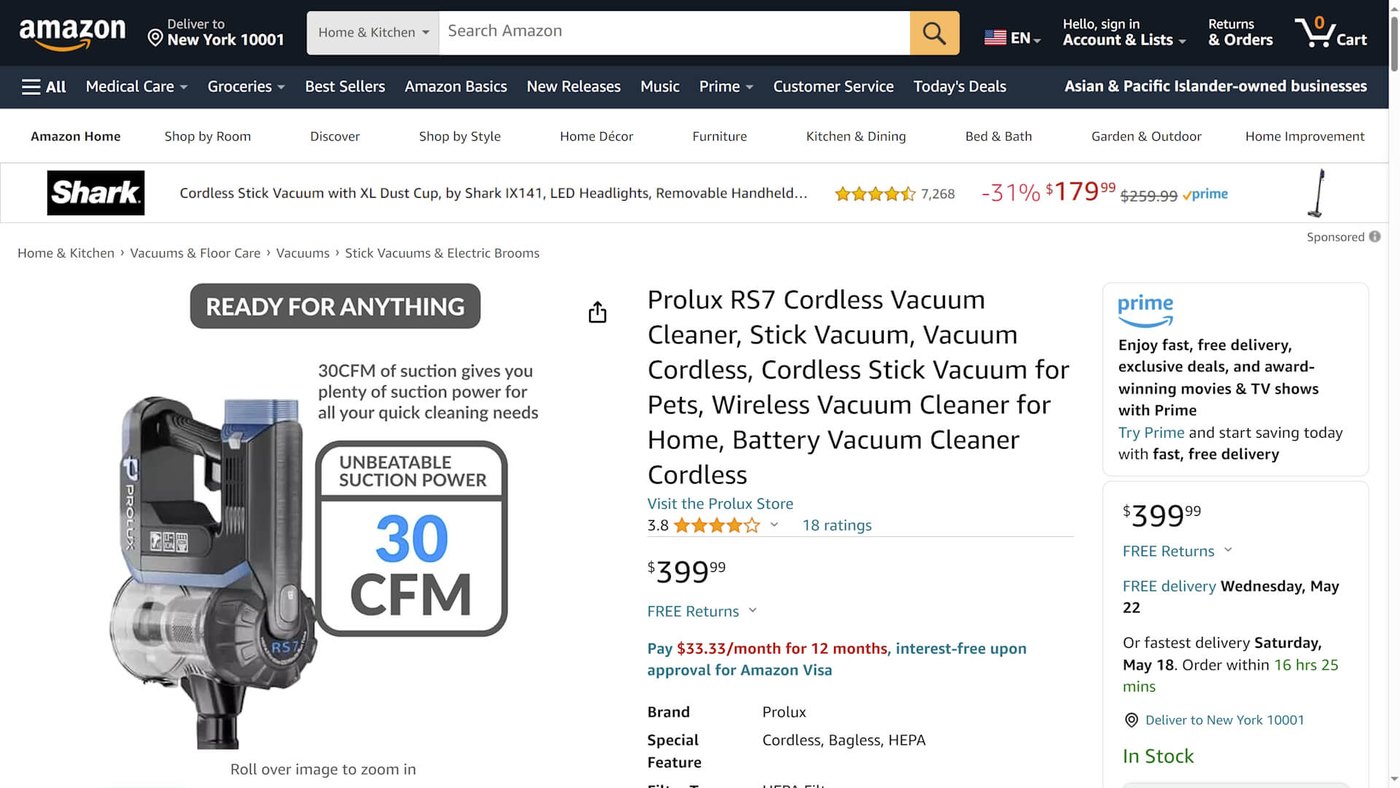
The same render live on the client Amazon listing.
- Supplied: reference photographs of the physical product
- Built: one model with separate parts for the head, tube, body and filter
- Delivered: eight silo angles, nine lifestyle scenes, marketing visuals and an animation
- Category: appliances
What these projects have in common
Different products, different budgets, one shape to the process.
- You do not need CAD to start, but send it if you have it. Four of the five projects above began from nothing but photographs, a few dimensions and material names. The ring arrived as a CAD file, and that made the geometry a settled question instead of a negotiated one. Either way the work starts.
- The grey model came before the materials. That is the cheapest point to change anything, and it is the approval clients most often rush. The gloves slider is that moment made visible.
- The mesh follows the object. Density where the shape and the hardware are, almost nothing on the flat panels. That is what makes the same file survive texturing, colourways and animation.
- The images are output, not the deliverable. In every case the asset outlived the first set of pictures it produced.
Want an example in your category?
Five projects cannot cover everything, and the category that matters to you is the one you sell. We have finished work in watches, furniture, packaging, electronics, equipment, vehicle interiors and most other product categories, including the models behind it.
Tell us what you make and we will send examples from that category, with the model shown the same way as on this page. Finished work across all categories is also in our portfolio, and a made-to-order jewelry catalogue shows what the same work looks like when it runs every month for one brand.
If you have a product to model
The starting point in four of the five examples above was the same: photographs, a few dimensions and a note about where the images had to end up. The fifth arrived as CAD, which settles the geometry but changes nothing about the rest. Modelling is billed at 20 USD per hour, which puts a simple part at 80 USD and a typical product around 200 USD, before any of the images that come off it. The full breakdown is on our 3D product modeling services page, and if the terms above are unfamiliar, start with what 3D modeling is. The images that come off the model, silo shots, scenes and colourways, are priced on 3D product rendering services.
Frequently asked questions

Ian Diev
Content Writer, Editor
Ian loves writing about innovative 3D technologies and their impact on architecture and design. In his spare time, he makes indie music, watches obscure movies, and cooks culinary masterpieces for friends.