
PHOTOREALISTIC RENDERING: 10 STEPS TO GETTING PERFECT LIFESTYLES FOR YOUR CAMPAIGN
Photorealistic rendering is an innovative tool to get the most impressive product images for effective marketing campaigns. Lifestyle cgi helps to enhance visual materials for social media marketing and email lists which increase conversions immensely, as well as click rate for online ads.
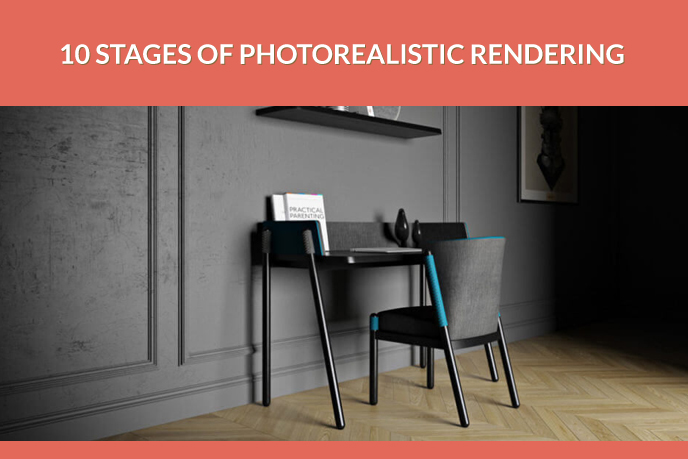
A marketing department of a furniture company decided on a new concept for an advertising campaign in luxurious classical style. The problem is that building and decorating such posh set for a photoshoot is way too expensive. Moreover, there’s no way one can prepare the set and manufacture furniture prototypes within the deadline. The photographer said he wouldn’t be able to make everything on time even in less extreme circumstances. As a result, the Marketers have only two options now - to postpone the advertising campaign or settle for a less impressive concept. Do they have to delay all their deadlines or opt for silos instead of luxurious lifestyles? Not at all. There is an alternative way that allows not to limit their creativity and get high-end imagery.
3D product rendering can save the situation from the coming disaster in no time. All the Marketers have to do is to contact cgi studio, order photorealistic rendering services and have everything done by a team of 3D Artists and a Project Manager. Want to know how the solution can be so fast and effective? Let’s find out more about the creating process of lifestyle product images.
#1. Defining a Concept of CG Rendering
The creation of a visual concept for photorealistic product images is based on a client’s brief that includes all his references and requirements. Typically, references consist of drawings, sketches and photos. A client can define not only the object he wants 3D modeled, but also the environment in which the object is to be placed. The preferred color palette, interior or exterior style, ambiance - every detail is important.
#2. Modeling 3D Objects
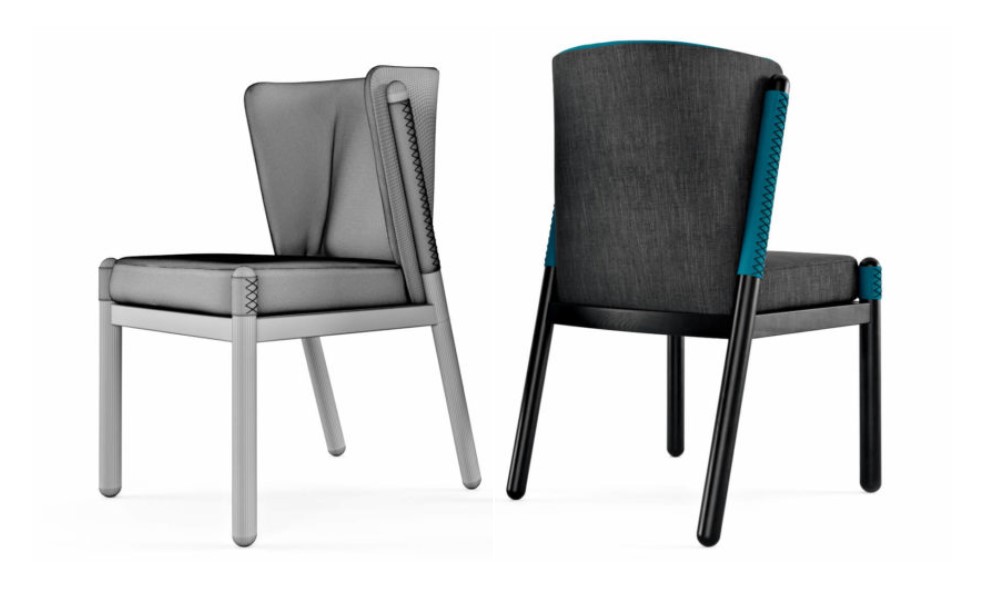
3D modeling stage is vital for rendering as it creates the base for all the following steps. A product is modeled according to the customer's reference files: drawings, sketches, photos, samples of materials and sometimes ready 3D models that need photorealistic background. The other 3D objects can be created from scratch if the client deems it necessary - to highlight the best features of the merchandise or give the setting a particular vibe.
#3. Designing a Scene
When all 3D models are finished, building of a scene around them starts. Usually 3D Artists create the most suitable environment for a product or choose a ready-made scene from a database. This is also a stage for determining the disposition of all 3D objects. For example, a cgi specialist sets furniture layout, doors and windows, walls and other basic aspects of the scene.
#4. Creating Details and Accents
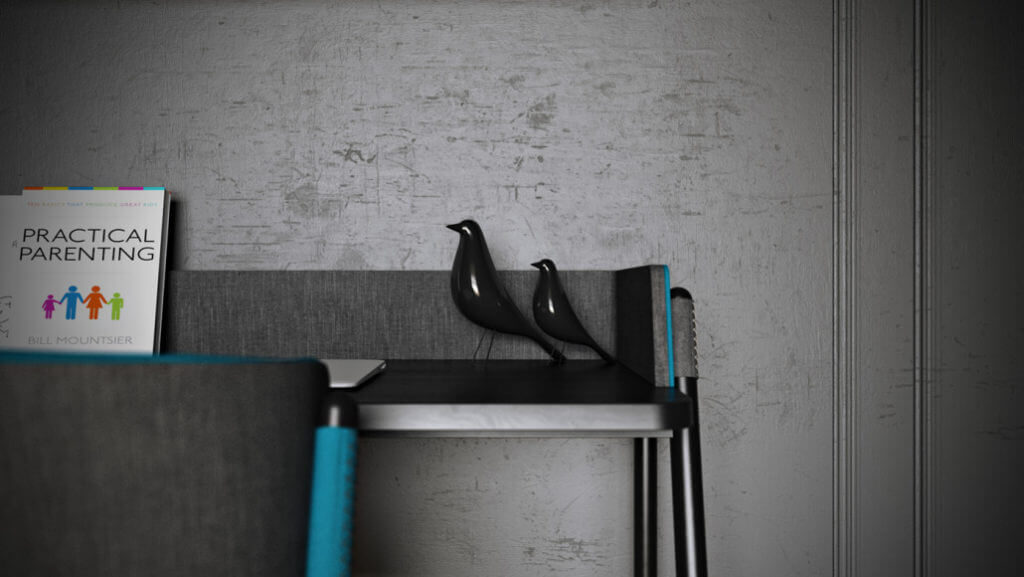
Even the built scene is not enough without distinctive details and decor that delineate certain styles of interior design. Decorations and accessories help to convey the ambiance chosen for the photorealistic product image and improve visual storytelling. To illustrate, blankets, flowers, books and candles form a cozy vibe for the photorealistic rendering, while plain minimalist decor makes an ambiance more strict and work-related. Moreover, such details make any environment look more believable and lively which always bring stronger response from customers.
#5. Adjusting High-Quality Textures
Next step is to place high-resolution textures on the objects that match them ideally. It's the 3D Artist who chooses the textures, but the Client can provide him with references for better understanding. The challenge here is to make surfaces look natural - for real textures can never be perfectly smooth. Different types of textile, stone, wood, metal have their own specific textures that need to be recreated for truly photorealistic renderings.
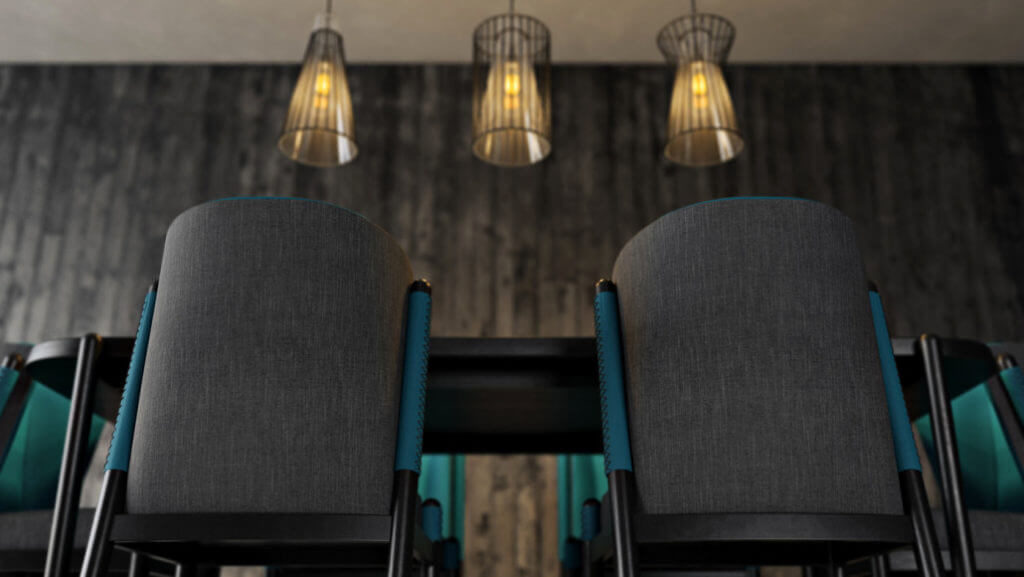
#6. Building Lighting Scenarios


Smart lighting scenarios highlight everything that’s important for a chosen concept and enhance photorealism of a rendering. A client chooses the main direction of lighting settings such as daylight, night, twilight or a few options for several images. Based on the decision, a 3D Artist establishes sunny or overcast weather, natural and artificial light sources, sets their direction, adjusts the shadows, tonality etc. The final touches of tweaking lighting are realistic reflections and gleams of light on the surfaces of objects.
#7. Setting Camera Viewpoints
Composition and frame construction are important for photorealistic cgi product photography as much as for traditional pictures. A client can choose a type of shot or even several of them while making an order. Hero shot, group shot, close-up - they all require different camera settings. A 3D Artist adjusts the camera position and angles accordingly, as well as framing and focal length before establishing the final viewpoint.
#8. Making Corrections
Most of the 3D Artists do draft rendering at low settings to detect errors that were not noticeable in the process. Even experienced professionals always find a couple of flaws they had overlooked before. Draft rendering is a chance to make final changes fast and effective. After that, a 3D Artist is ready to start rendering of the improved project at the required settings.
#9. Rendering the Approved Draft
The final photorealistic rendering is estimated by Project Managers and Mentors in terms of compliance with technical assignment and overall quality standards. In large-scale CGI studios the rendering is considered ready only after at least two rounds of approval. A 3D Artist or PM sends the result to a customer at optimal settings that include required format, size and image resolution. If a client doesn’t want any adjustments, the main part of the process is finished.
#10. Finishing Post-Production
The last refining step is very important for lifestyle product images as they require extra realistic details or context. At post-production stage, graphic designers step in and put final touches on photorealistic rendering. The complexity of the post-production depends on the client’s terms and references - sometimes a Designer has to add lightning in a stormy sky or put people in an environment.
All in all, this is how photorealistic renderings are created. They are gradually replacing common photographs and for good reason. After all, cgi opens up a lot of opportunities: the implementation of any idea without large financial costs for organizing a photoshoot, the result is obtained much faster, changes are always available. But most importantly, the final photorealistic product image can’t be distinguished from high-quality photos no matter how you look at it.
Want to get jaw-dropping visual materials for your marketing campaigns? Use photorealistic rendering services of our 3D modeling company and impress your clients with top-notch lifestyle product images.

Valerie Adams
Blog Writer
Valerie is an editor and content writer. She used to work on news and entertainment TV channels and in a fashion & design magazine. In her spare time, she enjoys visiting foreign countries, art events, film and street dancing festivals.