
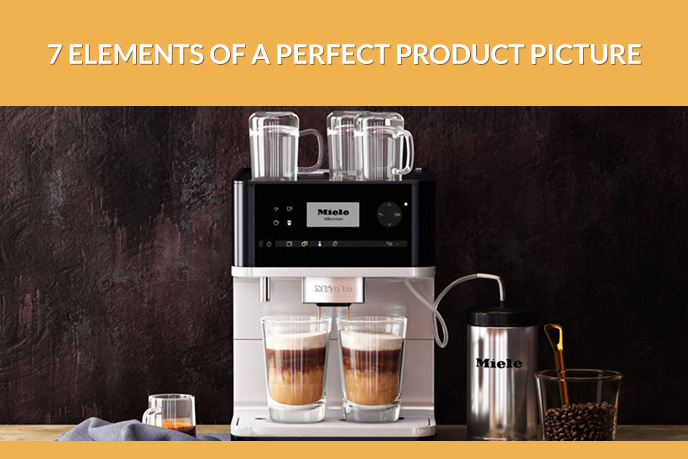
PROFESSIONAL PRODUCT PICTURES: 7 ELEMENTS FOR A PERFECT E-COMMERCE SHOT
Professional product pictures affect the entire marketing funnel for retailing firms, from advertising to an actual sale. For in the era of e-commerce, prospects’ notion and opinion about products heavily depend on visuals. They attract attention, inform, persuade, influence the emotional sphere of a consumer – in a word, they are true marketing assets.
To control the quality of product pictures, a Marketer needs to know exactly which elements turn them into a powerful sales tool. For however professional the outsourcer or employee responsible, it’s the Marketer who’ll have to deal with consequences. Poor visuals mean poor ecommerce sales, ineffective advertising and ultimately looking for new materials. Moreover, it’s hard to explain the requirements for these new product pictures, if a marketer doesn’t have a general knowledge of how these images are created. In our case, being informed is the first step to success.
Wonder what defines perfect e-commerce product images? Read up and find out 7 crucial elements for getting successful visuals for your advertising and marketing.
7 Elements for Successful Product Pictures
#1. Lighting
Light is a key to creating high-impact professional product pictures. When the camera lens opens, it emits rays of light, which, reflected, come back and are read to be translated into an image. Finding perfect illumination is a true art, so professional photographers adjust it with special equipment and a multitude of light sources. Complex lighting, bringing out the best features of a product, can be achieved by placing sources from different sides, at different angles and at different distances from the main object.
Depending on the direction, lighting for a professional product shot can be divided into 3 groups:
- Front lighting shines straight on the object and allows to illuminate every product detail, because shadows fall behind the object – so nothing conceals them. Front lighting, however, can be considered somewhat boring – it might look flat and doesn’t give the feeling of depth and volume.
- Side lighting illuminates only a part of the object and creates shadows that give an interesting and deep effect to the product picture. Moreover, using different side lightings makes for different product shots – for even a small adjustment can transform the image.
- Backlighting is tricky and the hardest to set. If the light just falls on the object from behind, only the item’s silhouette will be visible. But with a reflecting surface opposite the light source, a part of the light will fall on the product from the front too, revealing important parts and creating a deep and appealing picture.
Another factor to take into account is intensity, which defines whether the light is hard or soft. The intensity is directly affected by the size of the light source and its distance to the main object. Small and distant sources emit hard light, while broad and close ones make it softer.
Intensity also defines shadowing. Hard light casts strong shadows, which creates a darker atmosphere and therefore add drama to the picture. The risk is that too many shadows can conceal important product elements – so this light is tricky to install. Less intense illumination sets a lighter mood and is easier to handle, and therefore is more used for professional product pictures.
Now it’s easy to understand why lighting is treated with such awe by Photographers. It literally makes or breaks the product picture – much like the next factor below.
#2. Background
Background choice depends on the product features, target audience, emotions the image should elicit, and the brand visual style. But most importantly, the backdrop is chosen based on the resource where the picture will appear. For online platforms, social media and websites all have specific requirements or simply good practices for advertisers. Here’s the list of the most popular and creative options:
- White background image is a must-have item in professional product pictures kit. Online selling platforms always ask for them: white backdrop shots fully focus on the object, and therefore are honest and generate clicks.
- Solid Colors add more character to the picture. They influence the viewer’s emotions, and enrich the visual experience the product shot offers. If chosen correctly, the background color can emphasize the coloring of the object itself.
- Textures emphasize product materials and can turn the scene into a professional work of art. There are numerous options – for any brand, product and mood. For instance, a brand of women’s beauty products could use textures with glitter, while leaves, grass, or sand work well for eco product pictures.
- Lifestyle shots show the product in a natural environment and educate the prospects about its usage. Which makes it a great supplement to white backdrops and produces truly unique advertising pictures. There are many types to choose from: on-location pictures, hero shots, flatlays, model images. The important thing with lifestyles is to make them appealing to the target audience and show how the product solves their specific problems.
#3. Focus

Focus is the point at which rays emitted by the camera lens converge to form a clear and sharply defined image. The action of adjusting the distance between the lens and the main object in the frame to make light rays converge is called “to focus”.
Professional product pictures must fully showcase product design and make every single feature perfectly visible. But that would mean that every part of the image should be in focus – and that’s impossible. For when taking a photo, only a part of it gets into the so-called focus plane, where the sharpness is at its most. All the other areas will be slightly blurred, thus making the picture looking less crisp and even missing on some information.
That, however, can be helped with focus stacking. It consists in taking several pictures with different parts in focus and merging them using special software, Photoshop for instance. Once the process is over, photographer gets a perfectly sharp professional picture.
#4. Manual Settings

The adjustable settings greatly affect the final look of the shot. Wrong setting may ruin the image – leave it too bright and harsh, or make the colors dull. On the contrary, setting these parameters right may bring a juicy and professional-looking picture. The following two settings normally require manual approach:
ISO defines the camera’s sensitivity to light. The higher ISO, the brighter the picture – which makes it necessary for professional product photography in a dark environment. However, higher sensitivity comes at a cost – it means more grain. All in all, the goal is to find the right balance between setting proper lighting and picture quality. Once the ISO is adjusted according to the surroundings, one can get beautifully crisp photos.
White Balance affects how accurately colors are translated in a picture. The thing is, lighting sources have different light temperature – some colder and some warmer. This may distort colors in the resulting image. Hence the need to set the right white balance – to adjust a camera according to the product color and how light affects it. To do that, a Photographer chooses the “white card” option, holds a white card in front of the lense and press shutter release. The camera will then adopt the color for the white balance setting.
#5. Point of View
Point-of-view or POV refers to the position from which we see a scene. Developing different points of views for professional product pictures allows online shoppers to examine the merchandise from different sides and angles. The thing is, prospects can’t touch items when shopping online. Using various POVs, a marketer needs to visualize all the benefits the description contains. That’s why having a variety of camera angles is essential for internet product marketing.
These are the great points of view to experiment with at photoshoots:
- Eye-level allows to look at a product the same way we see it in real life. It’s a great angle for hero images.
- High angle showcases a product from above, as if the viewer looked down at it from a higher angle.
- Low angle is almost the same, except it demonstrates a product from below as if the viewer looked up at it.
- Bird’s eye is the look at a product directly from above – as if the viewer stands over it.
- Slanted stands for the simple view of a product from one particular side.
The best angles for professional e-commerce shots are those that showcase product benefits and emphasize the quality. They include close-ups of texture, print detail, fabric, as well as images where products are being put to use. If customers can inspect product elements they’re interested in, it raises their trust significantly.
#6. Post-processing
After the product picture is taken, it’s time to put the finishing touches and turn the picture into perfection. Photoshop and Lightroom are the most widespread choice for the task. They allow to fine-tune things like temperature, tint, tone of pictures, as well as remove unwanted parts – a wire the product has been attached to, for instance.
When constantly working with professional product pictures, the person charged with post-production has to repeat the same operations with all the batch. In Photoshop, this process can be sped up by scripts that make the program perform actions on all the images at once. A handy skill to consider for improved work effectiveness.
#7. Web Optimization

Before putting professional product pictures on the website, one needs to decrease them in size. Otherwise they’ll slow down the website navigation, which comes at a price to estores. For according to gomes.com and akamai. com, 47% of users believe that the page should be uploaded within less than 2 seconds. If the process takes over 3 seconds, 40% of users claim that they’ll leave the site.
Decreasing the size can be done in 2 ways: using professional software, like Photoshop, or with help of online apps – like https://tinypng.com or https://imagecompressor.com. Now with apps, the process is super-easy: one just uploads the pictures and gets results. However, applications tend to have limitations in quantity and weight of the processed images. In this case, Photoshop is indispensable. It has a great Save for Web option allowing to save the imagery with any weight and dimensions, and special scripts enable to this on a batch of images at once.
Unsure you can control the photoshoot results – on top of everything else you’ve got? Then you should know that there is an alternative allowing to get professional product pictures using 3D software. It’s fast, easy and high-quality – with all the 7 above mentioned factors perfectly arranged. Photorealistic 3D rendering and modeling can provide stellar quality visuals with any background, POVs and color schemes. Best of all, it doesn’t require transportation of bulky products, staging, decor installation, or hiring models. 3D Artists can conjure up everything digitally, and deliver campaign-ready results.
Want to get professional product pictures and 3D models of your products? Then contact UFO3D for 3D modeling services – and get breathtaking marketing and advertising materials!

Ian Diev
Content Writer, Editor
Ian loves writing about innovative 3D technologies and their impact on architecture and design. In his spare time, he makes indie music, watches obscure movies, and cooks culinary masterpieces for friends.
Let us know if you’ve got an interesting project and want to work together!
2 Comments on “PROFESSIONAL PRODUCT PICTURES: 7 ELEMENTS FOR A PERFECT E-COMMERCE SHOT”
Great guide! Thank you!
Honestly, this post will obviously help a lot of people on what makes up good product picture. Thank you so much
Thank you so much for Sharing an Informative Article!